Check Here Before Buying – Pot Size Matters...Not all websites offer the same. Plants in a 2-litre pot have twice the root system of a P9 or 1 litre pot.
April Gardening Jobs
Across the Garden
Weed and use Groundcover plants
- Weeding is one of the most essential tasks to do in your garden in April. Getting on top of perennial weeds now to save you a lot of time in future months.
- Hoe off surface weeds and hand-weed borders regularly so weeds don't have time to set seed. This is best done on a dry day with light wind, so the weeds will wilt on the surface of the soil, rather than re-rooting into moist soil and causing you a problem again further down the line.
- Pull out any larger weeds by hand, being careful to remove their longer tap roots.
- A weed knife is an effective tool for weeding between paving slabs. Alternatively, you can scorch off weeds between paving slabs using boiled water from a kettle or a flame gun.
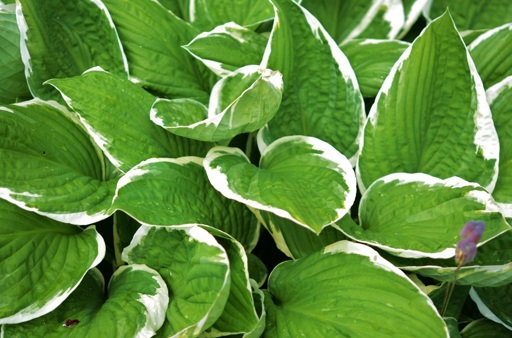
- Once under control, apply a layer of mulch that will help to keep weeds at bay and consider growing groundcover plants such as Ajuga reptans, Hostas, Geraniums and Stachys byzantine.

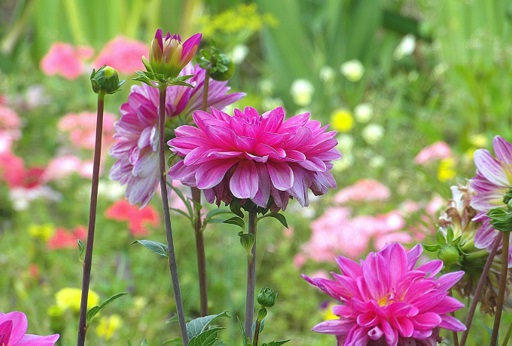
Plant Perennials
- Start planning any perennials you'd like in your garden, planting in groups of odd numbers for a naturalistic appearance and maximum impact. Perennials live for more than two years, as opposed to shorter lived annuals that live for one year and biennials that live for two years.
- There is a huge range to choose from with varying colours, styles, growth habits, flowering periods and textures. Some perennials are clump-forming, producing a tidy mound of neat foliage, whilst others such as Actaea simplex will produce a more sprawling display. Short-lived perennials such as delphinium and lupines will last just 3-4 years, whilst most will live for around 15 years and some such as peonies can stay with you for a lifetime.
- Combining flower and foliage colours effectively can be challenging. Consider integration and contrast. There's careful balance to be struck - too much of the same colour can be monotonous, yet a discord of too many different colour can be glaring and displeasing. We find the most common mistake is trying to incorporate too many different colours into a single border.
- Different perennials prefer different types of soil and light conditions, so it's best to check the specific requirements of the plants you're interested in. As a generalisation, you'll have the widest range to choose from if you establish your perennial border in a sunny spot sheltered from the wind, ideally in a loamy soil.
- See our article on How to plant, grow and care for Herbaceous Perennials.
Support Climbing Roses
- Climbing and rambling roses will need supporting and tying, to help their emerging shoots at this time as year as they’ll be starting to grow again for the spring.
- They are not self-clinging, so need a support structure such as a trellis or horizontal wires. Your roses will also flower better if trained as bending and twisting the stems slows down the flow of sap and promotes more flowering shoots.
- Start with the right equipment - thick gloves, goggles and a sharp pair of secateurs are essential.
- Next, ensure you have a suitable support such as an obelisk, arch, wall, trellis or fence. If needed, install horizontal support wires with the first 45cm (1 foot) above the ground, then a further 3-4 wires at 30cm (1 foot) intervals, leaving 7-10cm between the wall and the wires.
- Fan out the stems, curl them around your support structure/wires and tie in using string. Train the main shoots horizontally initially, then upwards to create a well-balanced framework of branches and encourage lateral flowering side shoots.
- The closer your main stems are to horizontal, the more flowers your rose will produce. If you are growing up an arch, twist the shoots back and forth to give you lots of horizontal growth.
- Tall growing plants such as Oriental Poppies, Aconitum, Peonies, Foxglove, Delphiniums and Lupins will also need staking to prevent them being blown down in the winds.
- See our article on How to plant a climbing rose.

In the Flower Garden
Sow Hardy Annuals
- Hardy annuals can be sown outdoors straight into the ground in April, which is a great option if you don’t have anywhere to sow them under-cover earlier in the year. In fact, some varieties like sunflowers, dill herbs and poppies perform best when sown directly into the soil.
- They’ll grow quickly, mature and flower their socks off in one single season. You can buy hardy annual seeds in mixed seed packs or variety by variety, depending on your preference.
- Thoroughly dig the soil to make sure it’s nice and open and not compacted, then rake level to a fine tilth. Once seeds germinate, they have limited energy reserves to break through the soil surface and reach the light. Large lumps of soil get in their way and lower your success rate.
- A rough rule of thumb is the larger the seed, the more energy it will have after germinating, meaning you’ll get away with a slightly rougher tilth. It’s essential smaller seeds are sown into a fine, crumbly soil, allowing the shoots to penetrate the soil surface and reach the light.
- If you’re planting an area with a mixture of different varieties in groups, use sand to mark out where each different type will be sown. Position shorter growing varieties at the front of the border and taller growing varieties towards the back of the border.
- Either sow seeds evenly over the surface of the soil or use a short garden cane to make shallow drills (tiny little trenches) in the soil and sow the seeds into those drills. Sowing in drills makes it easier for inexperienced gardeners to distinguish young seedlings from weeds in a few weeks.

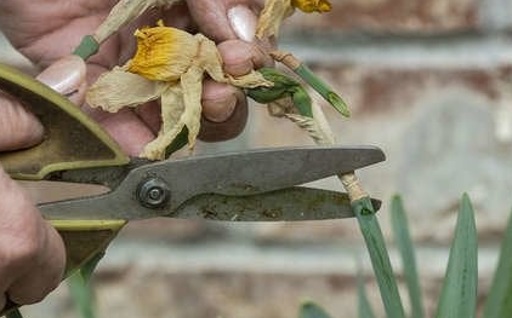
Deadhead Spring Bulbs and Bedding
- Deadheading means removing faded flowers from annuals, bulbs and perennials to encourage them to develop fresh new flowers, giving you the chance to enjoy another flush of blooms. Examples of flowers that benefit from dead heading include delphinium, salvia, lupine and phlox.
- It gives a dual-benefit of both maintaining the flowers appearance whilst also improving their performance. It stops plants from focusing their energy on the development of seeds after the petals of faded flowers have fallen and instead channelling it into new blooms.
- To deadhead flowers, simply pinch or cut off the flower stem below the spent flower, just above the first set of full, healthy leaves. Repeat this for all spent flowers on all of your plants.
- For larger plants or those with lots of flowers, it might be easier to use shears to trim away the top 5-8cm (2-3 inches) of growth or just enough to remove the spent flowers, though check carefully to make sure you’re not removing any fresh flowers in the process.
- Deadheading early and often is the best approach. It might feel like a tedious task to do each week, but you’ll reap the benefits in extra blooms with the job becoming overwhelming.
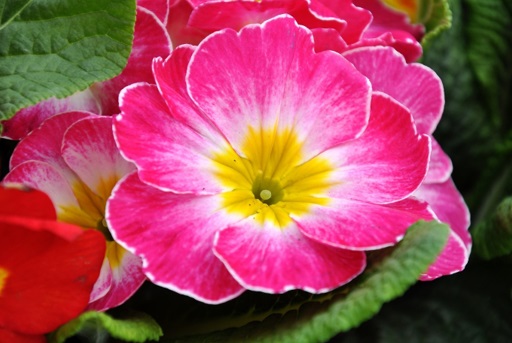
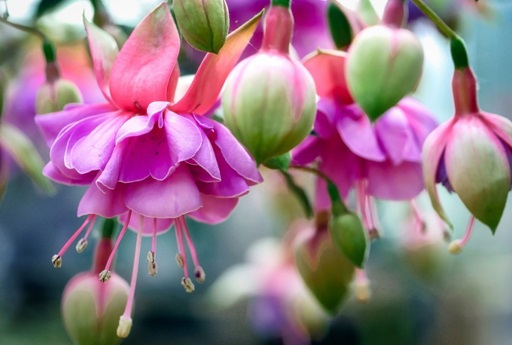
Add New Plants and Flowers for Fresh Colour
- Planting primroses and polyanthus in contains on the patio or at the front of the borders is a great way to introduce some instant colour when the rest of the garden is just waking up.
- Now is the time to sow sweet pea flowers at the base of cane supports, or below tepees and arches, to bring colour and fabulous fragrance to your garden when they flower between June and July. Some cultivars have a particularly intense, rich fragrance & can be cut to bring indoors.
- April is also one of your last opportunities to plant magnificent lily flower bulbs. Lilies are available in a wide range of shapes and colours with a fabulous fragrance. Plant them in groups of the same or different varieties to create splashes of bright colours through the summer.
Last Chance to Prune Hybrid Tea Roses
- Correctly pruning your hybrid tea rose will ensure it grows vigorously and blooms well year after year. They’re best pruned in March to early April, just as they’re starting to grow again.
- Make sure you have the right equipment for the job - a good pair of gardening gloves and sharp pair of secateurs are essential. We recommend wearing a thick jumper to protect your arms too.
- The traditional method of pruning hybrid tea roses involved cutting them all the way back to 45-60cm (18-24 inches) about ground level to an outward facing bud eye.
- This will encourage your rose flowers to develop on long stems, making them perfect for cutting and bringing indoors to perfume your home.
- Cutting back to an outward facing bud eye encourages each flowering stem to develop away from the centre of the plant, so they’re don’t bump into and damage one another as they grow.
- Read more about How to plant, grow and care for hybrid tea roses.

Garden Maintenance
Prune Hydrangeas to Prompt Vigorous Growth and Large Flowers
- Most hydrangeas flower from mid- to late-summer. Their faded flower heads are typically kept on the plant over the winter both to protect the buds underneath and because they look pretty as a rustic winter feature when glistering in ice or snow.
- Pruning off faded flower heads will help promote vigorous growth and large flowers in summer. The exception to this rule is climbing hydrangeas, which are pruned in summer after flowering.
- The best pruning method depends on whether your hydrangea flowers on current years’ growth or older wood. If you’re unsure, lightly pruning to the first pair of buds below the flower is the safest option to avoid being at risk of cutting away flower buds for this years’ blooms.
- Hydrangea aborescens & Hydrangea paniculata flower on older wood so can be cut back harder.
- Hydrangea serrata, Hydrangea quercifolia, Hydrangea macrophylla & Hydrangea aspera flower on current year’s growth, so lightly dead head faded flowers to the first pair of buds below.

Protect Delphiniums, Lupines and Hostas from Slugs and Snails
- Protect the lush foliage of delphiniums, lupines and hosta plants from slugs and snails.
- Copper rings can be an effective way to do this. When a slug tries to cross over the ring, it receives an ‘electric shock’ forcing it back. Other options include cracked egg shells and pellets.
- If using copper rings, bury them as deeply as possible as slugs may try to reach your plants from underneath for best results.
Spray Roses for Mildew, Rust and Black Spot
- Mildew is a type of fungus that appears as a thin white growth. Powdery mildew looks like spilt powder on leaves; downy mildew causes leaves to droop and develop yellow and brown spots. Powdery mildew has an aesthetic impact only, whereas downy mildew can kill your plants.
- Rose black spot is a fungal disease affecting roses identified by black or purple spots on the leaves, which often causes the foliage to drop early. It is caused by the fungus Diplocarpon rosae, which reduces the vigour of your roses.
- Rose rust is also a fungal disease of roses, which produces black or orange spores on the undersides of leaves. The parasitic fungus Phragmidium tuberculatum is specific to roses and may appear in spring, the persist until leaves fall in the autumn. Modern roses tend to be more resistant to rust than old English roses but are not completely immune.
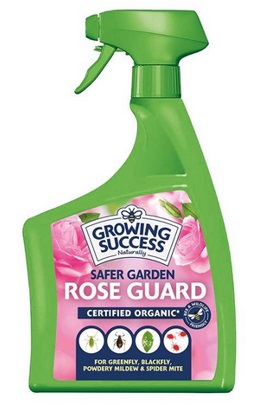
- We recommend our all-in-one Rose Guard spray, either as a way to tackle or used as a preventative measure against all of these possible rose problems.
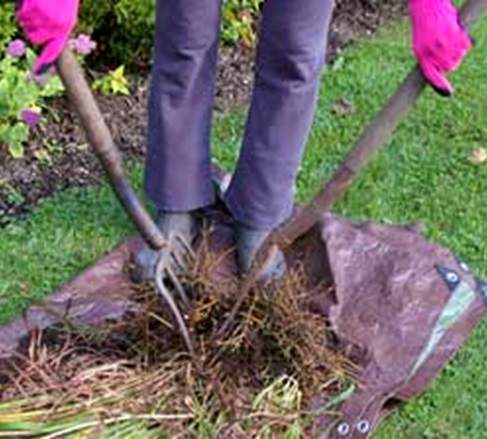
Reinvigorate Big Clumps of Perennials by Lifting and Dividing
- Perennials growing healthily will need to be lifted and divided every 3-4 years. Dividing helps prevent plants becoming too large for their location, maintains vigour and allows you to remove the oldest central parts of the root system which may have died out.
- Plants should be lifted and divided in early spring when the new growth is only a few inches high. If you miss your chance, wait until late autumn - don't be tempted to do it whilst your plants are in flower or full growth. The only exception is Irises which should be transplanted in early summer, immediately after they have flowered.
- Dig up the entire plant with some surrounding soil and lay it onto some tarpaulin or weed control fabric. Use a sharp spade to carefully chop clumps into smaller pieces, ensuring that each piece is not too small and has sufficient roots to successfully re-establish - splitting large clumps into 3-4 pieces is normally recommended.
- Once split, replant each divided clump with sufficient space in the garden or a container.
Mulch, Feed and Prune Ferns
- Apply a 5cm (2 inch) thick mulch of well rotted garden compost, leaves or pine needles around the base of your ferns each spring to keep the weeds at bay, boost the nutrients in your soil and retain moisture. Leave a 2cm gap between the mulch and base of your plant to prevent rotting.
- Feeding is not normally essential but if you want to give your ferns an extra boost, apply a slow release fertiliser sparingly in the spring, just as new growth has begun. If you have a particularly poor soil, applying some fish, blood and bone in spring works well.
- Pruning is easy - simply cut away old, dead fronds in late winter or early spring before new fronds start to uncurl. This is more of a tidy-up exercise than a necessity because, if not undertaken, the old fronds will simply fall to the ground and biodegrade naturally. After pruning, remove any debris from in/around your ferns to encourage good air circulation.

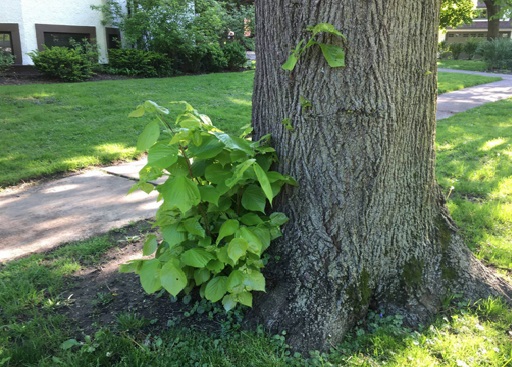
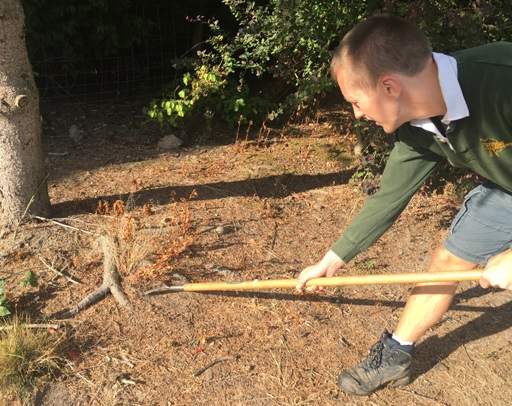
Remove Suckers from the base of Trees and Shrubs
- Some shrubs and trees can send up suckers from their roots. Suckers are new growths that appear from the roots of your main plant and can turn into another plant if left alone.
- It’s best to remove them because they drain your main plant of energy, can become numerous, deep-rooted and problematic. Suckers may appear in lawns, borders, between paving slabs or through paths and can be a nuisance if not kept in check early on.
- Trees that develop roots near the surface due to difficult growing conditions (e.g. a high water table or impenetrable material below the soil surface) are more prune to suckering.
- Remove suckers as soon as they are spotted, right back to their point of origin. You may need to remove some soil around the sucker to locate its base. It’s best to tear suckers away, rather than cut them, so you remove dormant basal buds in the process as well, so they don’t re-grow again.
- If you had to remove earth to find the base of the sucker, replace it back to a higher level again afterwards, adding back the turf again at the higher level if your tree adjoins a grassed area.
Fruit & Vegetable Garden
Plant Maincrop Potatoes
- Maincrop seed potatoes are planted in April and harvested from August to October. They take longer than early potatoes to mature, store well and are used for mashing, roasting and baking.
- Potatoes are easy to grow and one seed potato will produce many potatoes come harvest time.
- Prepare the ground by weeding, breaking up the earth using a fork and raking to a rough tilth.
- Dig straight trenches 60cm (2 feet) apart and 12cm (5 inches) deep. Plant your seed potatoes 30cm (1 foot) apart and back-fill with soil to fill the trench.
- Your potatoes should be ‘earthed up’ once they start to develop shoots of 15-20cm (6-8 inches) above ground. Earthing up is required to stop new tuber potatoes from turning green. It is essential because once tubers turn green they become poisonous and are effectively useless.
- ‘Earthing up’ means covering most of your potato plants with earth by drawing in soil around the stems of your plants using a hoe. Leave 5cm (2 inches) of growth visible about the ground.
- Begin earthing up once the shoots of your potatoes have reached around 20m (8 inches).

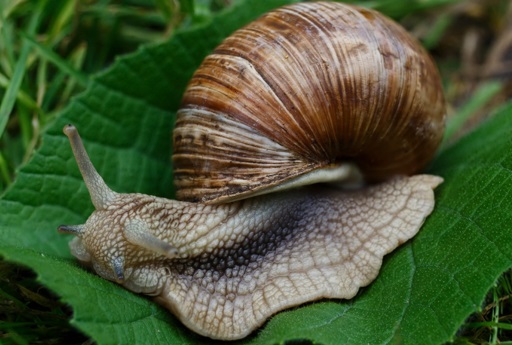
Protect Young Seedlings from Slugs and Snails
- Slugs and snails are often guilty of leaving holes in the leaves of bulbs, flowers, tubers and leafy vegetables. Their slimy trails can be the bane of gardeners’ lives.
- Slugs are especially problematic after dark in the spring months because there’s plenty of young growth for them to eat. We recommend accepting your garden will never be slug free and instead finding the best way to live with them & keep them off your plants.
- Protect vulnerable plants such as vegetables by leaving a ring of broken egg shells around your plants or using copper rings. Bury copper rings deeply so slugs cannot get underneath them.
- If you’re growing vegetables in containers, space them apart so there’s not a “bridge” of leaves from one plant to another – slugs and snails often move between potted plants in this way.
- Create habitats for slug predators that will eat the slugs and help solve the problem for you. Attracting birds to your garden by growing plants with berries and providing shelter and nesting spots in hedges or large shrubs is a good strategy. Thrushes and blackbirds will eat slugs & snails.
- Always sow a bit more than you need so you still have enough to harvest if some of your veg is affected by pests. If you have particular problems with slugs, consider planting out seedings a bit later until they’ve reached a larger size so they’re better able to withstand slug damage.
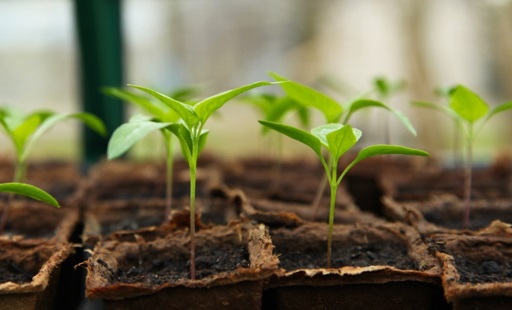
Sow Tomatoes, Courgettes and Chillies Outdoors in Containers
- Growing tomatoes is a fun experience for adults and children alike and if you’re lucky, you’ll be rewarded with a delicious, nutritious crop tasting better than anything you can find in the shops.
- Early April is a good time to sow tomatoes outdoors. Fill a small pot with seed compost, water thoroughly, then sow 3-4 seeds on the surface. Cover with vermiculite and cover with a clear plastic bag until the shoots start to appear.
- Seedlings will usually start to appear within 2 weeks. When you see them, remove the plastic bag and place them in as much light as possible to stop them growing thin and leggy.
- After a couple of weeks, move each seedling into its own individual pot. Fill small pots with multi-purpose compost, water thoroughly, then use a dibber to make a hole in the centre of each. Handle each seedling carefully, holding by a leaf rather than the delicate step and support the rootball using the dibber as you transplant them one at a time before gently firming in.
- Tomatoes grown in containers will dry out quickly, so may need daily watering in hot weather.

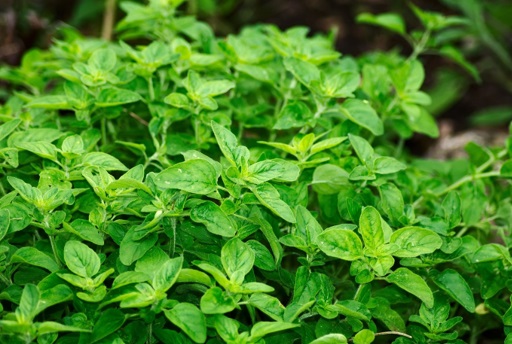
Lift, Divide and Replant Congested Clumps of Hardy Herbs
- Lifting, dividing and replanting congesting clumps of herbs is an effective way to rejuvenate your plants whilst also acting as a propagation method to create new plants for your garden.
- Herbaceous herbs can be lifted and divided between autumn and mid-spring, making April an appealing time to do it if you don’t want to venture into the garden in the cold winter months.
- We recommend doing this every 2-4 years using a shovel or garden fork and sharp knife.
- Start by digging around the base of the plant to free the rootball before levering it out of the ground. Divide into 2-3 parts using the knife. Ensure each divided section has roots and shoots.
- It’s best to replant the divided sections immediately if possible. If not, keep transplants out of direct sunlight and keep their roots moist and aim to plant within no longer than 24 hours.
- Herbs that benefit from being lifted and divided in this way include thyme, sage, tarragon, mint, lovage, chives, bergamot and chamomile.
Regularly Hoe between Rows of Vegetable Seedlings
- As weeds start growing more rapidly in the spring, it’s worth hoeing between rows of vegetable seeds regularly to keep them in check at an early stage.
- The aim when hoeing is to sever top growth from the roots, just below the soil surface, then leave it in the sun to wither. For larger weeds, pull them out by hand, removing the tap root.
- Collect and dispose of seed heads from dandelions and other weeds before they get a chance to release their seeds and spread throughout your garden.
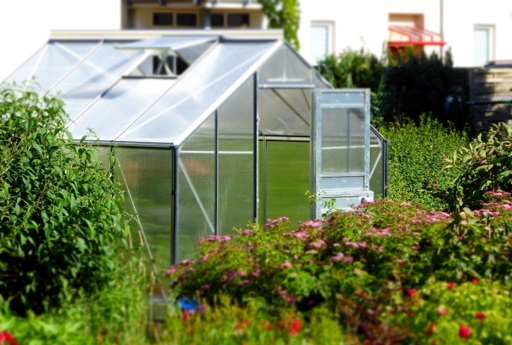
In the Greenhouse
Clear Greenhouse Glazing, Gutters and Water Butts
- It’s not the most glamorous of tasks but clearing glazing from greenhouse glass allows more light in for plants growing inside, while keeping gutters an water butts tidy helps remove any pests and diseases that might give your plants problems later in the growing season.
- It’s best to do this on a sunny, dry day. You’ll need a garden vacuum or stiff brush, gloves, hose or watering can, bucket of warm water and detergent and mop or brush. A pressure washer makes it quicker and easier to clean the floor and staging at the end but is not essential.
- Wearing gloves, start by running your hand along the guttering to clear any debris, which can be put in the compost bin. Rinse with a hose or watering can & check the fall pipe is not blocked.
- Next, vacuum up or brush away all compost, dirt and debris from the greenhouse frame, staging and floor. Be diligent in the corners and any small nooks & crannies where pests may be hiding.
- Wash down windows, both inside and out, being careful not to apply too much pressure or lean on the glass. This will help let in as much light as possible for your precious plants & seedlings.
- Finish by power washing the floor and staging inside, or scrubbing with a mop and detergent as an alternative. Once all dirty and debris is cleared away, leave it to dry out in the sun.
Improve Ventilation & Catch Pests
- Greenhouses are prone to overheating in sunny weather. April is a good time to start looking out for this as temperatures start to rise and you may get some sunny days. Protect your plants from excess heat by keeping your greenhouse well ventilated and using shading when required.
- Plants dry out quickly, especially when in small pots. The combination of a lack of water and overheating can harm and kill plants inside a greenhouse or conservatory.
- Open the doors, roof vents and side vents of your greenhouse on warm days to improve ventilation. Consider installing automatic vent openers which open/close based on temperature.
- Use a maximum/minimum thermometer to monitor the temperature in your greenhouse . If temperatures are allowed to build up beyond 27 degree Celsius, plant damage can occur.
- Hang traps for any flying pests in your greenhouse, such as whitefly.
Plant up Hanging Baskets with Summer Bedding to keep Indoors until after Risk of Frost
- April is the perfect time to start planting up your own hanging baskets and containers with summer bedding such as geraniums, fuchsias, petunias, lobelia and verbena plants.
- Different types and styles of baskets are available from garden centres, typically made from metal, plastic or wicker. They may have a thin plastic lining or coyer matt to retain water.
- Many people choose one of the cheaper baskets because the truth is, once the basket has been filled, you don’t see much of it anyway, especially if growing trailing plants out the sides.
- Use a liner around your basket and place a saucer at the bottom before planting up to prevent water from flooding out of the bottom when you water.
- Plant up using a mix of compost and water retaining gel. Water retaining gel is ideal to help stop hanging baskets (especially smaller ones) drying out very quickly by storing water and releasing it gradually over time. Use one scoop of gel for every 2 handfuls of compost, mixing it in well.

Pinch out the Growing Tips of Fuchsias, Dahlias and other Summer Bedding
- Pinching out is a pruning method to encourage young plants to develop multi-branched stems.
- It helps stop plants from looking straggly and provides more flowering stems and therefore more blooms later on in the season. Flowers that benefit from pinching out include dahlias, petunias, sweet peas, impatiens, salvia, marigolds, geraniums, snapdragons and fuchsias.
- When pinching out, go down to the point where you can see two buds/tiny little shoots and simply pinch out the stem immediately above that point. This will leave space for the new young shoots to grow away and produce more stems and flowers.
- Some herbs such as basil also benefit from pinching out to encourage them to continue to develop lush foliage and prevent them going to seed too soon. Always harvest herbs to just above a leaf node – don’t be tempted to just pull the leaves off.
- The same pinching out technique can be used for decorative foliage plants such as coleus too.
Greenhouse Growing and Caring
- Fast-growing microgreens such as mustard and kale can be sown outdoors in prepared ground raked to a fine tilth. They develop quickly and will be ready to harvest in just a few weeks.
- Seedlings grown in trays and pots can be pricked out and replanted into individual pots as soon as they produce their first set of true leaves.
- Herbs can be sown into pots or trays in the greenhouse or a sunny windowsill, ready for the warmer months. We have a wide range of herbs available, many at reduced prices.

- Sow sweet pea flowers in seed compost in deep pots, either on a sunny windowsill or frost-free greenhouse. Sweet peas are a stalwart of the cottage garden, prized for their beautiful blooms.
- Feed house plants with a balance liquid fertiliser once a week from April through to the autumn.
- Sow courgettes, cucumbers, French beans, pumpkins, runner beans and sweetcorn in pots.
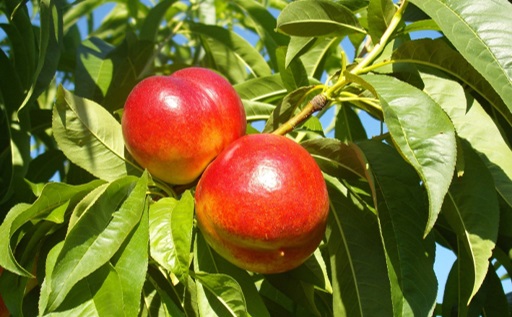
- Thin out fruit tree branches laden with fruit to allow remaining fruits to develop to their full size. We recommend thinning out fruits to ~10cm apart on nectarine and peach trees in particular.
Lawn Care
Repair Lawn Frost Damage
- Frost damage to your lawn can now be repaired; either re-sow with lawn seed or lay new turf.
- Laying turf is the easiest way to create a new lawn with instant impact, although it costs ~£3/sq. metre, much more expensive than repairing your lawn using grass seed. Lawn turf is supplied in rolls of 1 square metre each, usually comprising a hard-wearing mix of perennial rye grass.
- Laying turf in April gives chance for your new lawn to benefit from spring rain and establish roots, leaving it better equipped to take on the summer heat and winter cold.
- Prepare the ground by removing weeds, raking the ground level and rolling it out with a slight overlap between each roll. Pat down to ensure the roots and in contact with the soil with no air pockets, dips or hollows. Water well once laid and don’t walk on it for 3 weeks.
- The advantages of grass seed is that it’s much cheaper and easy to sow. Simply prepare the ground in the same way and scatter it in at the rate suggested on the packet. The drawback of grass seed is it takes longer to establish but it’s normally more economical for larger areas.
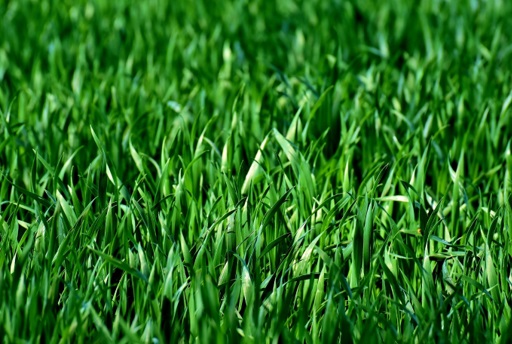
- Once done, fertilise to promote new growth in the coming year. When the weather starts warming up, mow your lawn regularly and treat it for any moss that may have appeared.
Pond Care
Add Barley Straw to your Pond to Prevent Algae
- In the spring and summer when temperatures start to rise and days get longer, you’re likely to see more algae growth in your pond.
- Adding Barley straw to ponds in April is an effective, 100% organic and completely safe way to prevent algae without harming the wildlife in your pond. Barley straw prevents algae by releasing chemicals into the water as it decomposes. These chemicals stunt the growth of algae.
- It normally takes the straw 2-4 weeks to start to decompose and release its natural chemicals. It will then remain active and effective at preventing algae growth for a few months.
- We recommend tying the Barley straw into your pond so it floats on the water surface, rather than being fully immersed because it requires oxygen as part of the decomposition process. Adding a pond pump to aerate the water also helps accelerate the process.
- Use 1 barley straw bale in ponds of up to 5,500 litres (~1,200 gallons) and replace it every ~8 weeks between spring and autumn. If you have particular problems with algae, use 2 bales.
Clean Fountains and Pumps, then put them back into your Pond
- Pond pumps need regular cleaning and maintenance because of the dirty environment they operate in. Every pond owner should know how to clean them and April is a good time to do it.
- Start by turning off the pump at the mains and to be extra safe and secure, unplug completely.
- Next, remove the pond pump from the pond by the hose (not the cable). We recommend attaching a cord to the pump to help retrieve it from the middle of larger ponds in future.
- Remove the pond pump cage, as well as any filter from the inside, which may be a sponge or plastic filter. You may need a screwdriver for this part.
- Clean out the pond pump cage and filter with a brush and hose pipe. Open and clean the impeller cover, chamber and impeller itself.
- Finish by putting everything back together again and putting your pump back in the pond.

Helping Wildlife
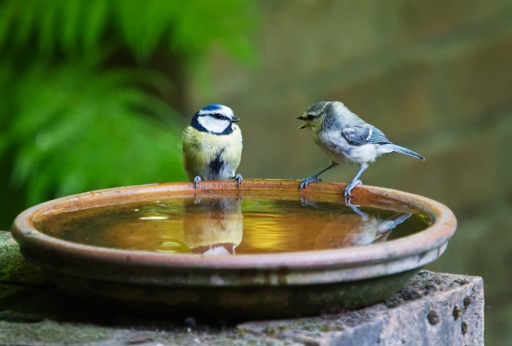
Clean Out Bird Baths, Bird Houses, etc
- Don’t forget about the wildlife that come to visit your garden. Bird baths, bird houses and bat boxes can be cleaned out and topped up with water – as long as there are no residents!
- Birds and other wildlife are still relying on your help for food, don’t forget to keep nuts, seeds and treats topped up.
Share this page: