How to plant, grow and care for Herbaceous Perennials
Perennials are plants that live for more than two years, as opposed to shorter lived annuals that live for one year and biennials that live for two years. They're distinct from shrubs and trees in that they have fleshy foliage with little or no woody growth and die back in the winter before springing back into life from the same set of roots each spring. Perennials are easy-to-grow, reliable performers that make up the backbone of the flower garden. There is a huge range to choose from with varying colours, styles, growth habits, flowering periods and textures. Some perennials are clump-forming, producing a tidy mound of neat foliage, whilst others such as Actaea simplex will produce a more sprawling display. Short-lived perennials such as delphinium and lupines will last just 3-4 years, whilst most will live for around 15 years and some such as peonies can stay with you for a lifetime. Flowering periods are similarly diverse spanning anything from 2 weeks to 2-3 months. Traditionally, perennials are planted in a border or island bed, but they're really diverse, combining well with shrubs and adding colour and interest to woodland or water-side settings, whilst clump-forming varieties look great under-planted around the edge of a larger plant in a container.
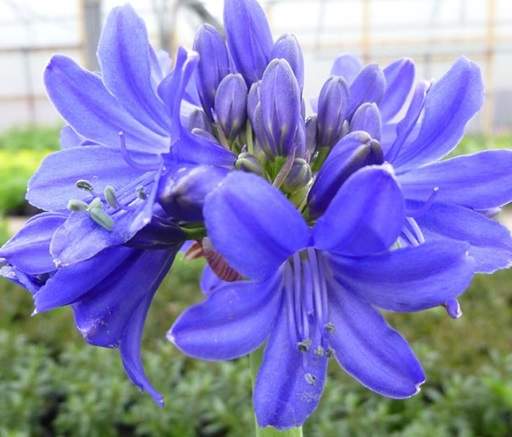
Agapanthus 'Sofie' (African Lily)

Planning a Perennial Border
Deciding on the Style
- Traditionally, perennial gardens are laid out in one of two ways: a border or an island bed.
- Borders are best maintained with clear lines and edges and a depth of 2-4 feet (60cm-1.2 metres). They are usually viewed from one side, often with a backdrop of woody plants such as trees, shrubs and roses, or maybe a hedge, stone wall or fence. Borders look most spectacular with perennials grown in groups or waves of colour.
- Island beds are designed to be viewed from all sides, surrounded by lawn with gentle curves and no sharp corners. They should be generously sized, around 8 feet (2.5 metres) by 15 feet (4.5 metres) is a good guide. Position the tallest perennials along the centre line of the island bed, with the lower growers around the edge.
- Another new style of garden that's been popular and successful at the Chelsea flower show recently is free-form, defined by nothing more than a series of meandering paths leading visitors into and through herbaceous plantings.
- Of course, you don't have to follow the traditional rules - many people now love rock gardens with their natural, irregular rocky outcrops and scattered array of alpines. Similarly, shade gardens are often irregularly shaped to follow the shade patterns of the plants or structures creating the shade from above. Perennials also combine well with shrubs, grasses and bulbs in a mixed garden border.
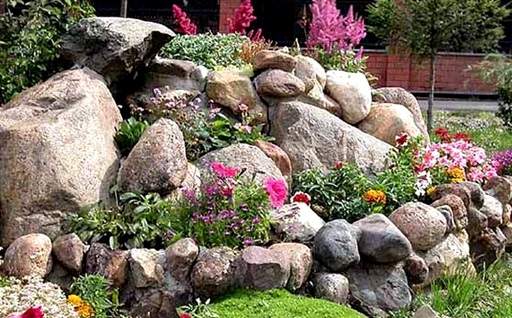
Rock gardens offer an attractive, informal display
Planting in drifts or individual specimens
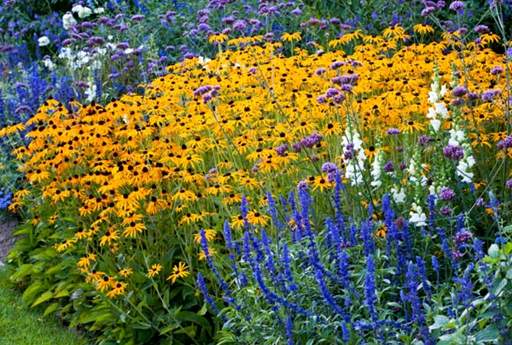
- Planting five or more plants of the same variety together in groups or waves will create drifts of repeating colours and textures, creating a pleasing and integrated visual effect. This also makes life easier when maintaining your garden as you'll be caring after plants in groups with the same requirements rather than one-by-one.
- To allow your perennials to "knit" together in groups with no soil visible in between you'll need to plant a little closer together than the eventual spreads might imply. For example, if you choose a variety with an eventual spread of say 60cm, you could plant 45-50cm apart. Avoid taking off more than 25% from the eventual spread otherwise there will be too much competition for light and moisture for your plants to succeed.
- The opposite extreme is to fill your garden with one or two of a bigger range of plants. This is more commonly a feature of keen plant collectors who don't mind the jumble of colour and textures to have a bit of everything. However, these types of gardens normally look less co-ordinated and maintenance is more challenging.

Plant perennials in groups or waves to create repeating colours and textures
Working with Colour
- Combining flower and foliage colours effectively is perhaps the most challenging part. Consider integration and contrast carefully. There's a careful balance to be struck - too much of the same colour can be monotonous, yet a discord of too many different colour can be glaring and displeasing. We find the most common mistake is trying to incorporate too many different colours into a single border.
- It's best to choose a theme of 3-5 colours such as pastels, cool colours or hot colours, rather than focusing principally on one. If you have multiple herbaceous borders you'll be able to experiment with different colour themes in each; you could have a pastel colour display near the front door with cooler colours in the back garden.
- It's important to remember when studying catalogue pictures that few perennials will be in flower for more than a few weeks each year, so it's the leaf colour and form that will be the status quo for most of the year.
- For best effect, have groups or waves of at least 2-3 different varieties together that will flower at the same time.
Choosing perennials and access requirements
- Different perennials prefer different types of soil and light conditions, so it's best to check the specific requirements of the plants you're interested in. As a generalisation, you'll have the widest range to choose from if you establish your perennial border in a sunny spot sheltered from the wind, ideally in a loamy soil.
- Check the hardiness of your preferred plants compared to your location and avoid positioning perennials in frost pockets or areas that are prone to cold, drying winds.
- An important consideration when planning your perennial border is how you'll access your plants to deadhead, lift and divide and stake when necessary. A visually appealing solution is to install stepping stones in the border, although for smaller gardens this will dig into the amount of space you have to plant. An alternative is to have a narrow walkway at the back of the border which will be hidden during the growing season but make your plants accessible when needed.
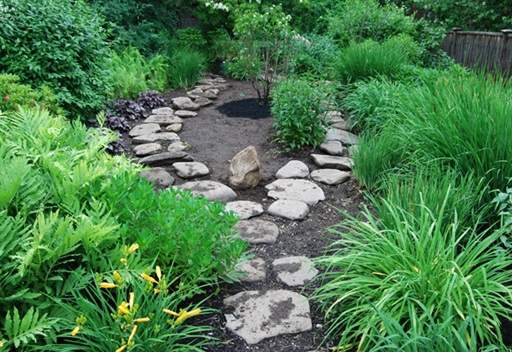
Stepping stone pathway through a perennial border
Managing height and spacing
- Take note of the eventual height and spreads on our website but don't forget that many perennials hold their flowers above the foliage, so when not in bloom your plants may be shorter than the specified height.
- Eventual heights and spreads are just a guide heavily impacted by growing conditions, so it's worth seeing what friends and neighbours have achieved with the same or similar plants in broadly the same conditions nearby.
- Position your tallest perennials at the back of the border, or on the centre-line of an island bed, with lower-growing varieties at the front or around the edge. Having said this, occasional use of taller plants at the mid or front can add to the effect.
- By planting your perennials the same distance apart as their eventual spread, they should fill your border without ever encroaching on surrounding plants. If you want a fuller looking border at the outset or want your perennials to "knit" together with no soil visible, you can plant a little closer together - for example, if a perennial has an eventual spread of 60cm, you could plant 45-50cm apart.
- The usual trade-off is between creating an instant perennial border that looks "full" whilst not planting too close together and creating a situation that won't be sustainable as your plants mature. Cost naturally comes into play too as the closer you position your perennials, the more you're going to need to cover any given space.
- A good tip is to position short-lived perennials between slower-growing, longer-lived plants. For example, peonies gradually fill out to 3 feet wide over 7-8 years but will look sparse if planted alone this far apart to begin with. So plant something like Shasta daisies in between to start with which will produce a plentiful display of flowers for 4 years or so then die away once your peonies need the extra space.
- Alternatively, you could plant smaller plants closer together than their eventual spread to begin with, then lift, divide and re-plant them at wider spacing in a few years' time to give them the extra room they need at that point.
- Don't be afraid to re-order and re-position perennial plantings if you don't get them quite right first time, following the same instructions as for lifting and dividing perennials given below.

Careful planning of height and spacing is key to a successful perennial garden
How to plant Perennials
When to plant
- Pot grown perennials can be planted at any time of the year providing your ground is not frozen or waterlogged. Autumn planting is best for lighter soils that aren't as moisture retentive as the cooler weather reduces stress on the top parts of the plant. For other soil types spring is preferable. Only plant in the height of summer if you'll be around to keep your perennials well watered or have an irrigation system in place.
- Bare root perennials should be planted either in autumn or early to mid-spring, again providing the ground is not frozen or waterlogged. They will remain dormant until the soil starts to warm up in April.
- The best time to plant perennials isn’t a hot, sunny day but a cooler, cloudier one — these conditions are less stressful for both the plants, and the gardener.
- If you need to delay planting, keep your perennials in a bright, cool but frost-free place and keep the roots moist. If you're using bare root perennials and planting is heavily delayed, 'heel-in' your plants by digging a temporary trench in the garden to accommodate the roots, cover them with loose garden soil and keep moist.
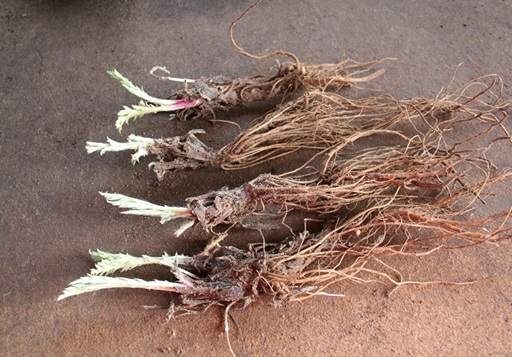
Bare root Echinops ritro 'Veitch's Blue'
Soil preparation
- It's important to prepare the soil well at the outset as it may be your only opportunity to loosen the soil, remove unwanted material such as rocks and weed roots and add organic matter.
- Ideally, cultivate the soil by double-digging the planting area. Do this by digging to one spade's depth, then loosing a further foot (30cm) into the ground by breaking up the soil using a garden fork. If you don't have the time or inclination to double-dig, at the very least we recommend single digging your soil and removing weeds, rocks and other unwanted material from the ground.
- If you have a poor or clay soil, mix a good quantity of well rotted garden compost or other organic matter into the ground across your planting area to enrich the soil. Organic matter helps to break up clay to improve drainage and on sandy soils it will act like a sponge to hold moisture in the ground, as well as improving soil fertility over time.
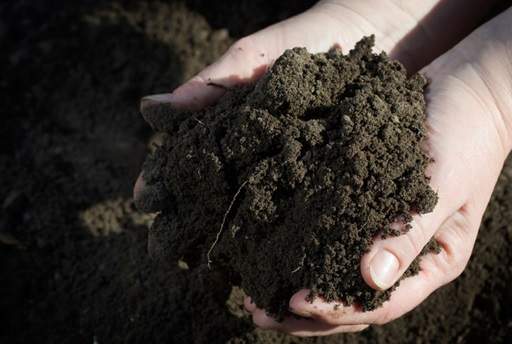
Prepare your soil before planting
Planting perennials
- Well-sized clumps of bare root perennials measuring 3 inches (7.5cm) wide or more can be planted straight into the garden. Smaller clumps are best potted up and grown in a sheltered part of the garden or cold frame before planting out. All the potted perennial plants we supply at Jackson's Nurseries are well established plants in 9cm or 12cm pots, so are fine to go straight into the garden.
- Arrange your plants on the surface to help you consider spacing, format and structure of the border. Follow the spacing recommendations above. If you're planting containerised perennials in the summer when they have top-growth this will also allow you to see how they will look before planting.
- If you've cultivated your soil as detailed above, create a hole just deep and wide enough to accommodate each clump or rootball with its roots spread out using a spade or trowel. Never shoehorn a plant into a hole that's too small. You just want to bury the roots, leaving the shoots above ground.
- If you haven't cultivated the whole planting area (not ideal but we know you're short on time), dig a hole at least twice as wide and slightly deeper than the perennial's container to help break up the soil surrounding the roots and mix the dug soil with some garden compost or well-rotted organic matter.
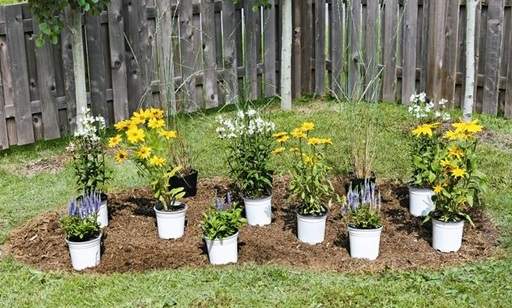
Arrange your plants on the surface to help you consider spacing, format and structure
- When planting, work with one plant at a time, so the root hairs aren't exposed to drying winds for longer than necessary. Carefully knock potted plants out of their containers. Handle plants by their root mass rather than the stems as the stems can be easily damaged.
- Tease out any roots that may have started to circle around the base of the pot by pushing your fingers into the bottom edge of the rootball and pulling outwards to rip the roots. Doing this a few times will encourage the roots to spread into the surrounding soil once planted. If roots are difficult to loosen by hand, make four shallow cuts into the root mass near the bottom with a sharp knife. This will promote growth into the surrounding soil.
- If the root system of potted perennials hasn't fully filled out the container and there is lots of spare potting mix but few roots, gently remove some of the potting soil with your hands to ensure the plant roots will be in direct contact with the garden soil once planted. Potting mix dries quicker than garden soil so putting excess into the planting hole will leave your plants more vulnerable to drying out.
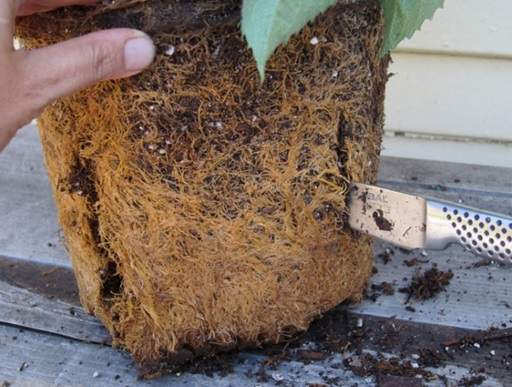
If roots are very pot-bound, make 4 shallow cuts into the root mass near the base
- Virtually all perennials should be planted at the same depth as they were grown in the pot. Check the depth is correct by positioning your plant into the centre of the hole and laying a bamboo cane across it before backfilling. If it's too low, add some soil to the bottom of the hole and if it's standing too high, remove some more soil.
- Backfill around the sides of your perennial with the soil mixture, firming down carefully using your hands for smaller clumps and your heel for larger plants. Firm down enough to get rid of air pockets and properly secure your plants but don't overdo it as you don't want to squash your plants in.
- Mulch with well rotted garden compost, bark or other organic matter to help retain moisture, reduce competition from weeds and protect the clumps and roots from cold in the winter. Leave a couple of inch (5cm) gap between the mulch and foliage of your plants to prevent rotting.
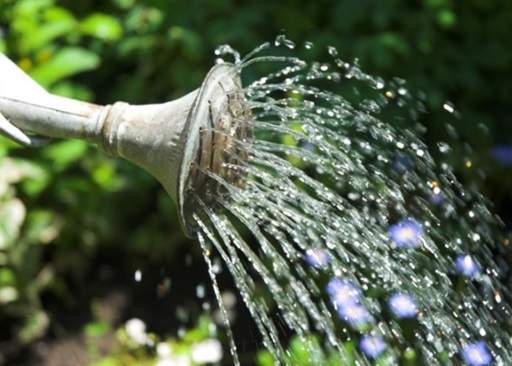
- Water well immediately after planting to help settle the soil, even if rain is forecast.
Garden Care
Watering, feeding and mulching
- The key to success with perennials is to keep them well-watered, particularly in the first year and during periods of hot, dry weather. Water the ground surrounding your plants (not the foliage) to keep it moist but not soggy.
- Perennials are not greedy feeders, so we don't recommend feeding at planting time and just making one application of a high phosphorus, low-nitrogen fertiliser each spring if plants appear yellow or growth is poor.
- New perennial gardens, particularly those which are sparsely planted, will benefit from a mulch to retain moisture and suppress weeds. Bark, shredded leaves, straw or dry grass clippings serve this purpose, as well as being aesthetically pleasing. Avoid using large chunks of mulch as this will over-power your plants.

Mulch with an organic material such as bark, straw or grass clippings
Edging borders and pinching growing tips
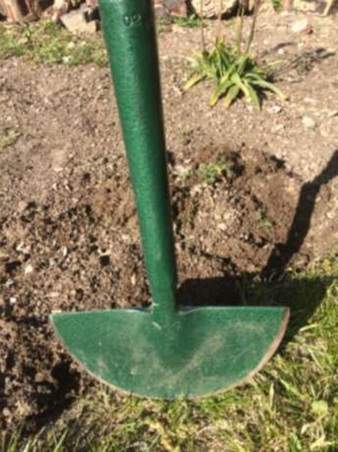
- Maintaining cleanly cut edges to delineate your perennial border or island bed from the lawn will keep your garden looking professional. Invest in an edging tool and re-cut the edge 3-4 times during the growing season. Alternatively, consider installing a permanent edging material such as granite blocks, wooden pegs, railway sleepers or styled stone. A defined edge helps prevent grass and weeds from growing into the border.
- Some perennials such as salvias, asters and phlox benefit from the growing tips being pinched back to create a bushier habit, encourage more flowers and prevent them from getting too top-heavy and flopping over. Use your thumb and forefinger to pinch back growing tips once or twice during the spring. Not all varieties should be pinched so check the information on our perennial plants pages and feel free to contact us if in doubt.
An edging tool used to keep borders cleanly delineated from the lawn
Deadheading and Staking
- Some perennials will retain their flowers and seed heads for several months after they have faded, often right into the winter. Cleanly removing spent flower heads will keep your plants looking tidy and may stimulate a further flush of flowers. It also prevents your perennials from wasting energy on seed production.
- Some varieties such as geraniums, creeping phlox, dianthus and daisies should be shorn rather than deadheaded. Again, check our perennial plants pages for more information and contact us if you are unsure.
- Taller growing perennials with flimsy stems such as hybrid lilies and delphiniums will require staking to prevent them from flopping or the flowers from being blown over. For aesthetic reasons its best to make supports as well disguised and in-keeping as possible. We find installing a framework of bamboo canes or thin branches works well, whilst wire support rings are another option. Install your supports in early spring so your plants will grow over and hide them through the summer.
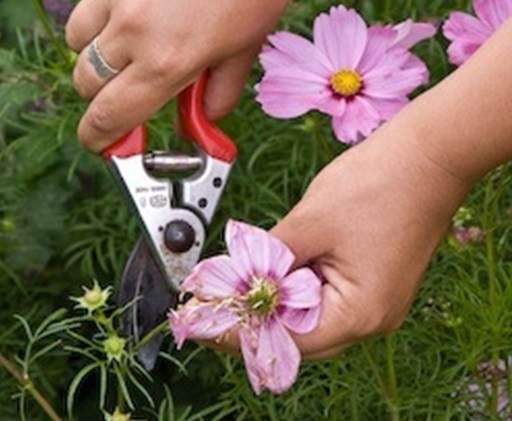
Deadheading perennials
Pests and Diseases
- Watch out for slugs and snails from February onwards and protect your perennials by scattering broken egg shells around the base of your plants or using slug pellets if required. You may also need to keep a look out for rabbits and voles depending on your location. If your plants look damaged, diseased or otherwise stressed during the growing season, feed them with a quick-release organic fertiliser.
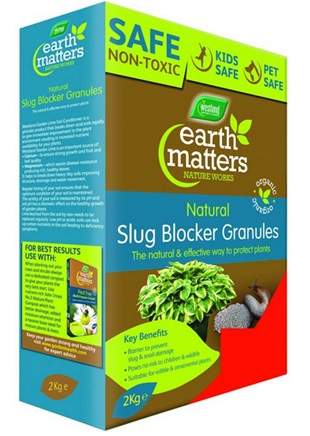
Slug pellets may be required to protect your plants
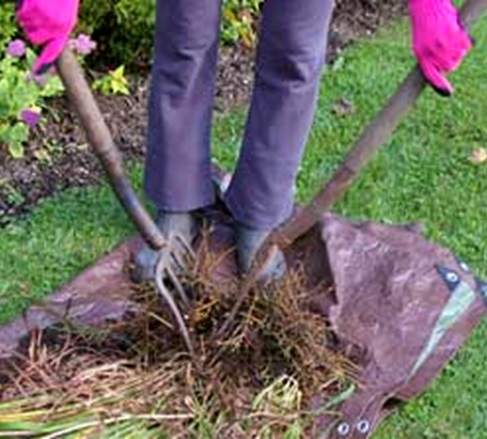
Lifting and Dividing Perennials
- Perennials growing healthily will need to be lifted and divided every 3-4 years. Dividing helps prevent plants becoming too large for their location, maintains vigour and allows you to remove the oldest central parts of the root system which may have died out.
- Plants should be lifted and divided in early spring when the new growth is only a few inches high. If you miss your chance, wait until late autumn - don't be tempted to do it whilst your plants are in flower or full growth. The only exception is Irises which should be transplanted in early summer, immediately after they have flowered.
- Dig up the entire plant with some surrounding soil and lay it onto some tarpaulin or weed control fabric. Use a sharp spade to carefully chop clumps into smaller pieces, ensuring that each piece is not too small and has sufficient roots to successfully re-establish - splitting large clumps into 3-4 pieces is normally recommended.
- Once split, replant each divided clump with sufficient space in the garden or a container.
Pruning
- Guidance depends on the variety. There isn't any rule of thumb that applies to all perennials - some such as hybrid lilies should be left well alone and may die if the foliage is cut, whilst others are best cut back in midsummer. Please check our individual perennial plant pages for specific pruning instructions.
Buying Perennials
At Jackson's Nurseries, we supply mature plants in 9cm or larger containers, which will establish and fill out more quickly and produce flowers from the outset.
Share this page: