Understanding your Soil
Careful planning and preparation before you race ahead to plant up new borders or re-plant existing plots in your garden is essential; it will help you avoid the disappointment that inevitably results if plants are thrown into a plot without any forethought. Soil is easy to take for granted but an understanding of your soil type and its proper preparation are the essential foundation works for a thriving garden. Perfect garden soil, as seen in your favourite gardening programmes and magazines, does not just happen - it usually has to be created through a concerted effort.
Perfect garden soil like you see on TV usually requires a concerted effort
Understanding your current Soil Type
The first step in preparing your soil is to better understand the type of soil you have at the moment, so you know what you are working with. The four most important properties of soil for plant growing are 1) texture/composition, 2) drainage, 3) fertility and 4) pH. You must understand how your soil measures against each of these properties before you can determine appropriate steps to improve the quality of your ground. We recommend below different exercises you can do yourself to determine the characteristics of your soil. These exercises involve digging down 10-15cm in different places within your garden to obtain a reliable soil sample. In conjunction with a common sense visual and touch test, the exercises will give you a good idea as to the properties of your soil. If you want absolute precision, consider buying a soil testing kit. This will provide you with a detailed chart of numbers about the drainage, pH, nutrient level and extent of organic content in your ground, which you can use to take a more exact and scientific approach to improving your ground. In practice, if you have the time and inclination, the self-testing methods are usually sufficient.
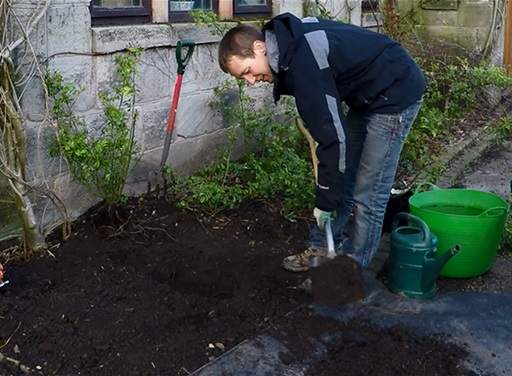
Taking a soil sample from the garden
1) Texture and Composition
The 3 main constituents of soil are sand, silt and clay. You can check the texture and composition of your soil by mixing a soil sample with water, shaking it up in a jar and measuring what proportion of the soil materials settle to the ground within different amounts of time. The test is straightforward to do:
Your measurements will indicate the composition of your soil (relative percentages of sand, silt and clay). If you don't want to stand waiting for the particles to settle, you can leave the jar on the counter overnight - the 3 distinct layers should be clearly visible the next day.
1.Obtain a soil sample from your garden from 10-15cm below the surface.
2.Break or crumble the soil down into small granules
3.Put a large cup worth of soil into a large, narrow glass jar and mix with water until 3/4 full.
4.Shake the jar vigorously for 30 seconds, ensuring that none of the soil sticks to the sides or bottom.
5.Leave the jar on a flat counter.
6. Mark and measure the level of settled materials at the bottom of the jar at the following intervals:
a. 1 minute (after placing jar on flat counter) - this is sand
b. 5 minutes - this is silt
c. 1 hour - this is clay
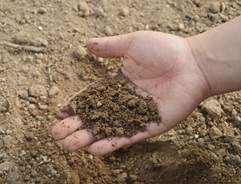
For a quicker, more rough and ready self-test of your soils' composition, squeeze a handful of soil into a ball in your palms. If it does not hold its shape, your soil is too sandy. If your soil does form a ball you either have clay or loamy soil. Trying to break the ball apart by exerting pressure on it with a thumb of finger will determine which is the case - if the soil breaks apart readily, you have an ideal loamy soil. If the ball is smooth, sticky and does not easily break apart, you have too much clay in your soil.

Clay soils will readily form into a ball in your hands
Soil Types
It is worthwhile at this point considering the main 3 types of garden soil and their key characteristics:
A. Light, dry, nutrient-poor sand - soil with 70% or more sand is very well aerated but also tends to lack essential nutrients and requires watering more frequently as it does not retain moisture as well as heavier soil.
B. Heavy clay - soil with more than 35% clay is generally more nutrient-rich, just requiring the addition of compost and small amounts of fertiliser. It also retains moisture so requires less frequent watering in spring and summer. On the downside, clay is dense, clings to your boots, is normally badly aerated and often results in 'puddling' following wet weather, leaving your plants with wet feet.
C. Rich garden loam - An ideal garden soil, or loam, would be about 40% sand, 40% silt and 20% clay. This mix is generally well-suited to growing plants; if you have it, you're in luck, because it will make your life in the garden that much easier.
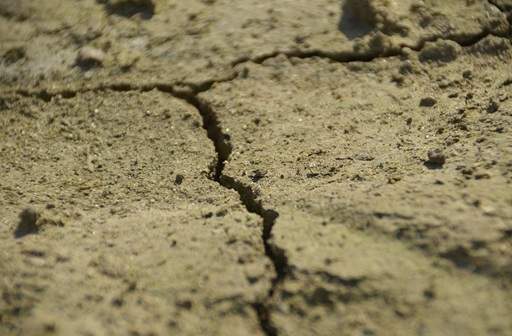
Sandy soil dries out quickly during periods of hot weather
2) Drainage
Conducting a test to better understand the drainage of your soil will take some time and effort, but is well worth it. Start by digging several trenches 60cm long and 30cm deep in different parts of your garden on a day when it hasn't rained for at least a week and filling them with water. This will allow you to establish how quickly moisture moves through the soil to assess your soil type:
- 1 to 15 minutes - the soil (probably predominantly sand) is very quick draining. Changes should be made to improve water retention
- 15 to 30 minutes - drainage of your soil is perfect for growing plants
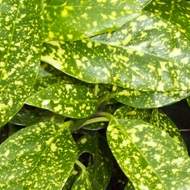
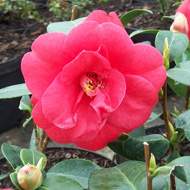
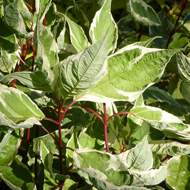
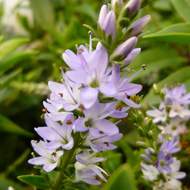
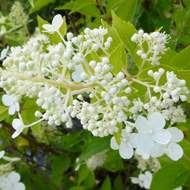
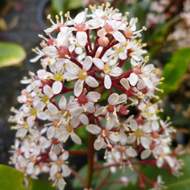
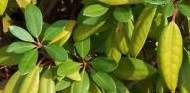
- 30 minutes to 4 hours - the drainage of your water is acceptable for plants that can thrive in moist soil (e.g. Aucuba, Camellia, Cornus, Hebe, Hydrangea or Skimmia) but you should consider improving the drainage to allow you to grow a wider range of plants
- More than 4 hours - Drainage is very poor and even plants that are well adapted to wet areas are likely to struggle. Improving drainage by artificially altering the composition of your ground is a must
|
|
|
|
|
|
3) Fertility - Learning from Weeds and Existing Plant Growth
Nutrients are chemicals that plants need in small amounts but which are essential to keep them healthy. They are similar to the vitamins that humans need. Accurately gauging the fertility of your soil without having a soil test is slightly trickier and requires a little more thought and attention. The best 2 ways to assess soil fertility are, firstly, to consider the position and extent of weed growth on vacant or newly prepared soil in your garden (to give a general indication of fertility levels) and, secondly, to assess the growth quality of existing plants in your garden to identify particular nutrient deficiencies ( to give a specific indication of the exact nutrient that is lacking).
First Method- If weeds do not readily grow on prepared, vacant soil, the soil likely lacks nutrients and moisture and requires work. If weeds grow but with discoloured leaves or retarded growth, this implies there is a nutrient deficiency in your soil and more NPK is required. Finally, areas that harbour weeds when left unmanaged for a short space of time probably offer good moisture and nutrient levels for strong plant growth also, so no work is likely to be needed, except to keep back the weeds once you have planted!
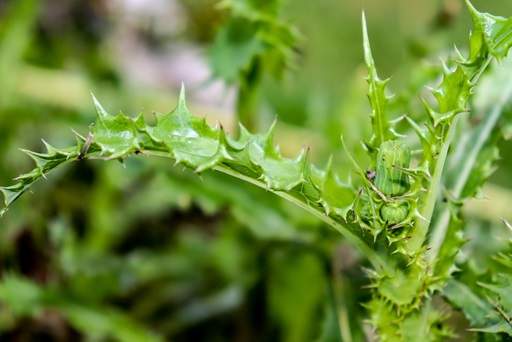
Weed growth on vacant soil is a good indication of soil fertility
Second Method- If the growth quality of existing plants is poor, a more specific indication as to which nutrient is lacking can be found by considering the deficiency symptoms:
Nitrates
Stunted growth and yellow older leaves
Phosphates

Poor roots and purple younger leaves
Potassium

Yellow leaves with dead spots
Identifying exactly which nutrients are lacking using the method above is not an exact science. However, it's not that important to get exactly right either because in almost all cases if soil is unfertile, it will lack all of the essential NPK nutrients. Most fertilisers are general purpose and contain all three nutrients so providing you follow the instructions on the packet and do not apply too much, you will not have any problems.
4) pH
pH measures the acidity or alkalinity of your soil. The pH of your soil will determine which plants you should choose because some plants only like pH neutral soils (pH7), others prefer an acidic soil, whilst others will only thrive in an alkaline environment. The easier and cheapest way to test the pH of your soil is to see how samples of soil react to the addition of firstly, vinegar and, secondly, baking soda (using separate samples of soil of each). The steps are as follows:
1. Obtain 2 samples of soil from your garden from 10-15cm below the surface
2. Add 50ml of vinegar to one sample. If it fizzes, your soil is alkaline
3. Add water to the second sample until the soil is very wet and muddy. Then, poor 50ml of baking soda onto the muddy soil. If it fizzes, your soil is acidic
4. If neither sample began fizzing, check both again via the addition of more vinegar and baking soda respectively. If there is still no fizzing, it means you have a neutral soil with a pH or roughly 7. This is good, as it is the pH that most plants need to thrive.
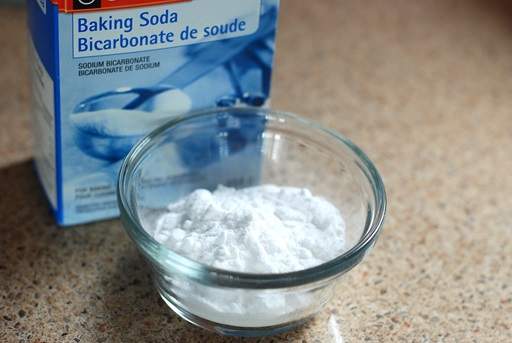
Baking soda can be used to test a soil's acidity

Modifying Soil
Once you have assessed the properties of your existing ground, you are ready to determine what steps should be taken to improve your soil. Even if you are fortunate enough to be blessed with a healthy, nutrient-rich soil, some of the information and tips below will still help you.
Adjusting Drainage by changing the Composition of your Soil
If you have identified you have a fast-draining, sandy soil, you should considering mixing in a thick layer of compost and organic matter and even a couple of inches of clay. Compost, especially if peat-based, will improve the water-retention of your soil and prevent it from drying out very quickly. Organic options include making your own compost using a composter and incorporating this into your soil, or just mixing organic material into your ground, such as rotted mature, mashed up twigs and bark, peat, moss, old shredded leaves and composted lawn clippings.
Organic materials also assist in moisture and nutrient retention and, as they decay, provide a gradual, steady flow of nutrients to your soil. Remember that, because organic matter decays over time, it needs to be replaced at least annually to maintain the desired texture and fertility, being careful not to cover the crowns of plants (where the stem emerges from the ground) as you do so to avoid disease problems. Also bear in mind that, due to this decay process, the organic matter will only increase the level of your soil temporarily. If the decay of organic matter results in the soil level exposing the roots of some of your plants, add more soil to cover the roots.

Mulching a rose with manure to improve the fertility of the soil
On the flip-side, if you have a boggy, slow-draining, clay soil, you should mix in sand to improve the drainage. If you have a very high proportion of clay in your soil (50%+) or a high silt content as well as clay in your soil, consider mixing in a combination of sand and peat. Some gardeners who have soil with these characteristics, especially in urban areas, find that mixing in sand only can actually make the ground even harder, creating a kind of concrete. Adding in peat as well will prevent this from happening.
Fertilising your Soil
Soil fertilisers can help improve your soil if current deficient growth suggests that your existing plants are malnutritioned. Once you have identified a nutrient deficiency, there are essentially 2 options to correct it: 1) using chemical fertilisers or 2) incorporating organic matter in your ground, which will gradually decay over time, slowing releasing nutrients into the soil as it does so.
The 3 nutrients commonly found in chemical fertilisers are nitrogen, phosphorus and potassium, or NPK for short. The mix of NPK in any fertiliser will always be indicated on the packet. Remember that too much of any nutrient can actually produce toxic results (for example too much nitrogen can burn and kill your plants) so follow the fertiliser application instructions carefully and don't be tempted to over-do it.
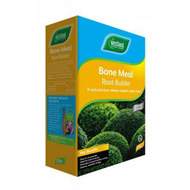
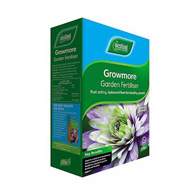
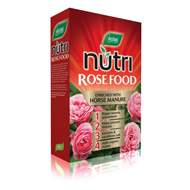
Products and nutrients to consider include Bonemeal, Growmore and Rose Food.
|
|
|
Whilst organic fertilisation should be the preferred option, it is only suitable for correcting small nutrient deficiencies because organic materials contain a lower percentage of nutrients compared to inorganic fertilisers and release their nutrients more slowly. In situations where the nutrient deficiency is larger or quicker results are needed, manufactured soil fertilisers are recommended. A good comprise is often to give your soil an initial boost with inorganic fertilisers, then seeking to manage the fertility of your soil using organic means on an on-going basis.
PH
We generally recommend choosing plants to suit the pH of your garden soil, rather than looking to change the pH of your ground to match particular plants you like.
If you must change the pH of your soil, look to use the following materials, depending on whether the soil needs to be made more acidic or alkaline:
- Limestone - neutralised acid, making it useful for raising the pH of acidic soils. Add in the autumn and follow the guidelines on the pack as overdosing can have a detrimental impact
- Pine Bark, Compost, Pine Needles or Sulphur - lower the alkalinity of the soil gradually, whilst also improving its texture.
If you are looking to change the pH of your soil you must be aware that it is an on-going job, not a one-off exercise, as continuous amendments will be required. If, for example, you plant an acid loving shrub in a naturally alkaline soil which you artificially make acidic by adding sulphur, it will only continue to thrive if you continue to add sulphur (or pine bark, compost or pine needles) at least annually. If you allow the soil to gradually revert back to its natural alkaline state again, the plant is likely to struggle.
For Neutral soils
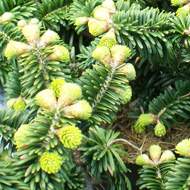 Abies balsamea 'Nana' |
 Epimedium x rubrum |
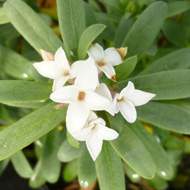 Daphne x transatlantica 'Eternal Fragrance' |
For Acidic soils
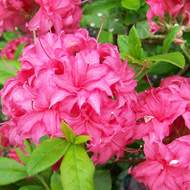 Rhododendron 'Homebush' |
 Acer palmatum dissectum 'Viridis' |
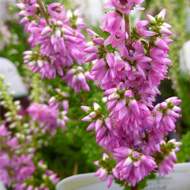 Calluna vulgaris 'Darkness' |
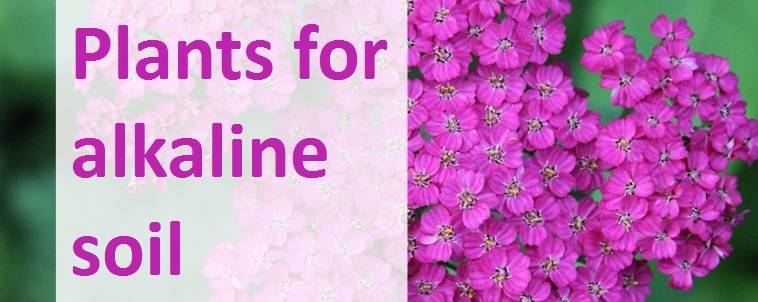
For Alkaline soils
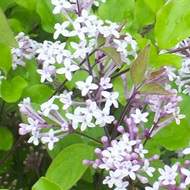
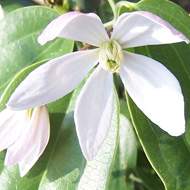 Clematis armandii 'Apple Blossom' |
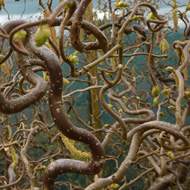 Corylus avellana 'Contorta' |
Preparing your Soil for Planting
If you're planting a brand new garden (or one that has fallen fallow which you're bringing back to life) you can get it ready the autumn before you plant to give the soil amendments a chance to settle and meld. If soil preparation is done in the spring, don't start too early when the ground is still semi-frozen or soggy. Digging the ground too early can damage the soil structure and lead to poor aeration and drainage, especially if you have heavy ground.
To test whether the time is right, grab a handful of soil and squeeze it together - if it forms a mud ball, you need to defer your preparation; if it falls about in your hands, you're good to get started. Bear in mind that heavy clay soils may stick together anyway even if they aren't particularly moist, so consider how wet the soil feels in this case to determine whether its the right time to dig. Clay soil that is too wet will feel slick when rubbed between thumb and forefinger. If it sticks together but doesn't feel wet, slick and smooth, you can start digging but must remember to incorporate sand and organic matter as part of your ground preparation work.
Prepare the soil by mixing in a good quantity of compost when the ground is slightly moist using a spade. If you have compacted clay soil, rotovating or 'turning' the soil with a spade with assist with aeration and mixing in sand or organic matter at the same time will improve drainage. Remove weeds, other unwanted vegetation, stones and rocks as you go along. When rotovating heavy clay soil or breaking ground for a new garden, reduce the engine speed so it turns the soil more slowly and thoroughly with less bouncing and bucking.
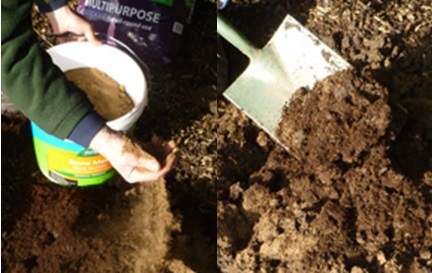
Mixing soil with good quality compost and adding blood, fish and bone if you have a very poor soil
Rotovate only when the ground is slightly dry and easily crumbled. Once the ground has been 'turned' or rotovated once, add the necessary fertiliser and soil conditions over the planting area and mix into the soil, this time 'turning' the soil with a spade or rotovating more deeply.
Double-Digging for Rose Beds
Double-digging essentially means 'turning' the soil to a depth of 2 spade lengths, rather than one. Although hard work, it is recommended when planting deeper-rooted plants such as perennials and roses. Starting at one end of a strip of ground that is vacant of grass and other vegetation, dig a trench one spade's width wide and one spade's length deep, putting the dug soil into a wheelbarrow. Once complete, turn and break up the soil below the bottom of the trench (i.e. 2 spades deep into the ground).
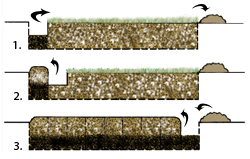
You may alternatively wish to use a fork to break up the lower ground, mixing organic matter into the deeper soil as required.Once complete, move onto the next spade-width strip of ground and turn the top spade's length of soil into the first trench. Again, use your spade or fork to break up the subsurface soil. Repeat the process until you reach the end of the final strip of the planting ground and fill the final strip using the soil from your wheelbarrow.
After you've Planted - Mulching
Mulching involves laying a thin layer of bark, straw or other organic material around the base of your plants to protect the roots and assist in the retention of water by minimising evaporation. It offers the added benefit of preventing the growth of weeds and improving the appearance of your garden. To mulch apply a 5-8cm layer of the desired material, being careful not to cover the crowns of your plants to avoid the risk of disease.

Mulching ferns after planting
Soil Maintenance at the End of the Gardening Season
The end of the garden season is a great time to follow a couple of simple steps to improve the quality of your soil ready for the next gardening season. Consider spreading a few inches of compost over your growing bed and covering with a mulch such as bark. This will help to protect the soil over the winter and lock in some nutrients ready for the next planting season.
Other Options?
If your ground is extremely poor, or you don't want to go to the effort of digging your soil, consider building a raised bed instead.
Share this page: