How to install a trellis against a wall
- A trellis is a good option when growing twining climbers against a wall or fence. Twiners don't grip directly onto stone or brick but will wind tendrils around a support. Trellis help you cover a wall with climbing plants without worrying about them damaging the structure of the wall.
- Don't secure the trellis flush against the wall as this will leave no room for your climbers to twine around it and prevent air circulation around your plants. Instead, use wooden "battens" to raise it at least 5cm (2 inches) from the wall surface, with the bottom 30-45cm (1-1.5 feet) above ground level to prevent rotting and avoid breaching your damp proof course.
- Battens are long, narrow lengths of wood (cut to the same height as the trellis) that will be positioned between the outer frame of your trellis and the wall. They should be mounted on the wall vertically so that they do not restrict plant growth. Ideally battens should be narrower than the trellis frame so they'll be hidden by the trellis once installed. An alternative is to use smaller pieces of wood in each corner as "batten corners".

What you'll need:
Materials:
- Trellis
- Timber posts to use as battens
- Screws
- Wall plugs
Tools:
- Tape measure
- Pen or pencil to mark measurements
- Spirit level
- Drill and masonry bit
- Screwdriver
Instructions:
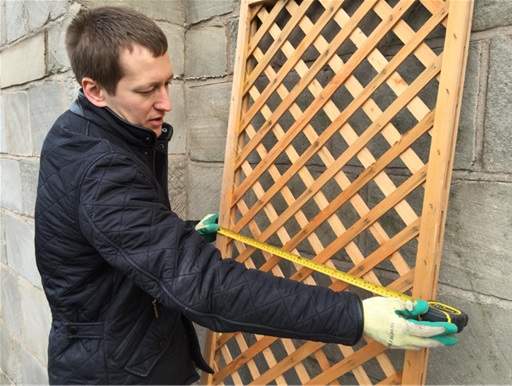
- Offer the trellis up to the wall in the desired position, check it is level and mark each of the four corners. The bottom of the trellis should be 30-45cm (1-1.5 feet) above ground level to prevent rotting and avoid breaching your damp proof course.

- Figure out how many battens you're going to need. For a trellis less than 90cm wide you'll just need two battens - one between the wall and each of the outer verticals of the trellis frame. For trellis more than 90cm wide, also install a central batten that will run down the middle of your trellis for extra stability.
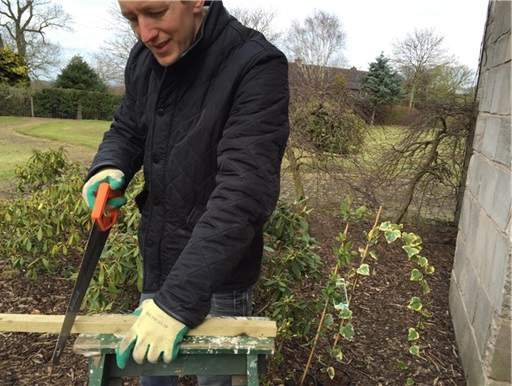
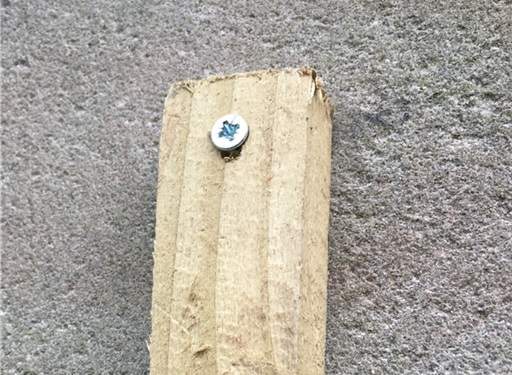
- Cut the battens to length. The length needs to be the same as the height of your trellis.
- Fix the battens to the wall using screws and wall plugs. If you're using batten corners instead of full length battens, position them very slightly inside the four-corner marks made for your trellis so they'll be hidden by trellis frame once installed.
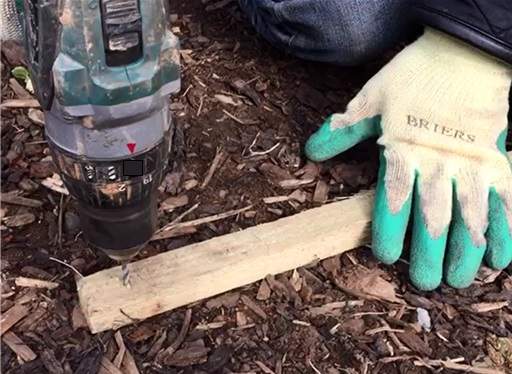
- To do this, start by drilling a clearance hole through both ends of each of your battens to allow the screws to be installed more easily later. Remember the pilot hole needs to be smaller than the screw diameter you will use, otherwise screws will not hold.

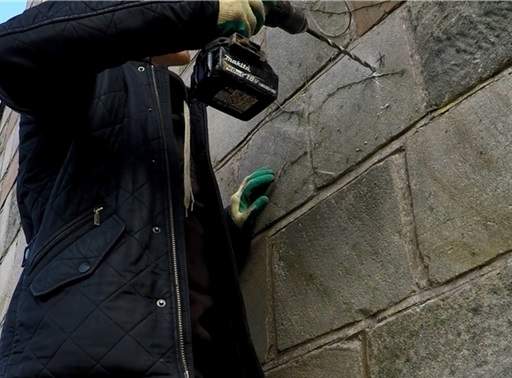
- Change the setting on your drill to a hammer action setting and use a small masonry drill bit. Put one of your battens into position as a guide for where to drill, then drill through the hole in your batten to make a mark into the stonework. Once you've made a mark into the stonework you can remove the batten and drill into the wall. Remember to wear safety goggles when drilling any type of stoneware.
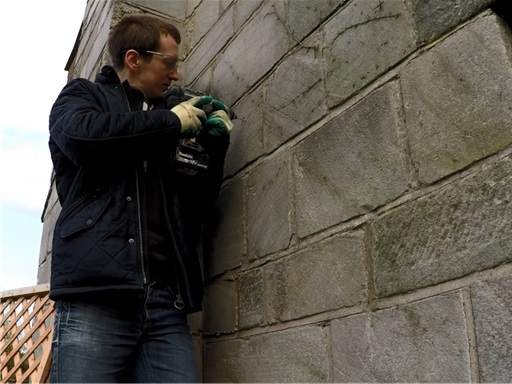
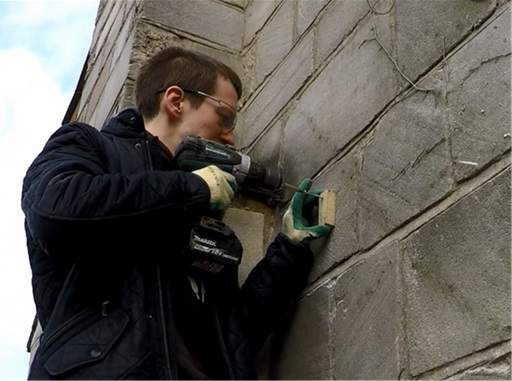
- Once the pilot hole has been drilled, use a larger drill bit to create the right size hole for the right size plug. Repeat the process, drilling holes into the wall where the top and bottom of each batten will be secured, or for each of the batten corners if you're going with that approach.
- Knock wall plugs into each of the holes and secure battens to your wall with screws. Securing the top of each batten to the wall first will make life easier.
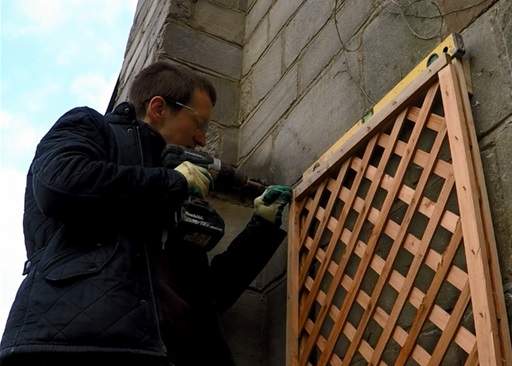
- Once the battens are in place, drill clearance holes through each of the four corners of your trellis.
- Screw the trellis into the battens. The easiest way to do this is to install the top row of screws first, ideally getting someone to hold the trellis in place whilst you install the first screw. If you're working alone, it may help to prop the trellis up into the required position using a bag of compost.
For planting instructions please see our separate article on how to plant, grow and care for climbing plants.

Share this page: