Check Here Before Buying – Pot Size Matters...Not all websites offer the same. Plants in a 2-litre pot have twice the root system of a P9 or 1 litre pot.
How to create a Rock Garden with Alpine Plants
A solid rockery or rock garden can last for years and years and offer a fun and interesting challenge for any budding gardener. A rock garden is designed to stand out as a formation of aesthetically pleasing rocks surrounded by suitable plants and interesting features.
They can often be used to break up different sections of a garden and can also be an excellent way to beautify potentially unused areas. Combining with water features can create stunning organic vistas that can be enjoyed all year round and even add value to your property.
Hopefully reading this guide will help you to decide if this is a project you would like to take on. You won’t be disappointed with the results!
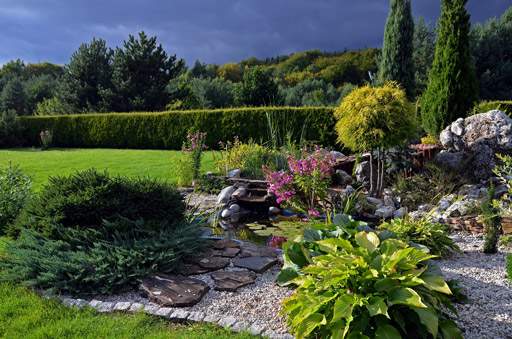
A rockery used as a focal point on a lawn
Considerations
It is important when thinking about designing and planting up a rock garden that you ensure the soil is reasonably dry. Wet soil will compress under foot which in turn can hinder the initial growth of new plants as well as cause rocks to become unstable or shift away from their intended location.
Late summer to early autumn can be an ideal time to do so as the summer temperatures allow the soil to dry as well as allowing plenty of time for everything to settle down and bed in before the winter weather comes in later in the year.
If it is possible to try and make sure your new rock garden is as south facing as possible for excellent sun exposure throughout the day and ideally on a slope to help ensure good drainage and reduce the likelihood of soil becoming too soft and wet. It is also a good idea to avoid over-hanging trees that could interfere with sunlight.
Preparation
Once you have decided on the ideal place for your new project it’s time to prepare the location!
On a slope
If you have decided on a sloping position then the first step is to dig up all unwanted vegetation and ensure it is free from weeds. While a natural slope usually provides suitable drainage it is important to test this out by digging a few holes around the intended plot down to around two feet and fill them with water and leave for around 24 hours. If there is no water left then you are good to go. If there is water it may be that a drainage layer is required which will be explained further down the page.
On flat ground
It may be that you would prefer a flat location and if this is the case there are some options.
- A raised bed - First you might consider a raised bed which can help highlight the rockery and make great use of space in sections between pathways or even the edges of a garden or driveway. A height of around 3 feet is ideal for a raised bed and the walls can be built with anything from brick and concrete to completely mortar less stone or even old recycled railway sleepers.
- A Berm - A ‘Berm’ is essentially an artificially created soil mound with sloping sides all around and can be used to add texture to a flat area or even be used to hide unsightly features and/or redirect foot traffic. Typically they are around 1 – 2 feet tall and can vary in scale from small isolated mounts to huge partitioning hills.
Ensure good drainage
Whichever of the above positions you decided on will require suitable drainage to ensure optimal soil conditions for your plants and to help avoid any movement in the ground. This process is fundamentally the same for any location.
- If any soil is already present remove between 1 and 3 feet depending on available depth.
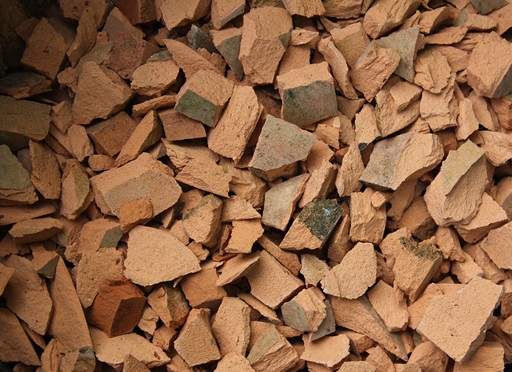
- Create a bottom drainage layer using broken bits of pots, old bricks or cement or even gravel. Make sure this layer is roughly even and flat.
- Next, a good 6 – 12 inches of sand will create a permeable yet sturdy base for the all-important topsoil.
- Finally, the topsoil should be mixed with some gravel and peat and replaced to the original or intended height. Excess gravel can be saved for finishing touches later on.
Once this is done it is finally time to move onto the exciting process of bringing your vision to life.
Which rocks to use
When thinking about rocks there is more to consider than you might think. If you live in the countryside it might be worth finding out about the rocks in your local area and matching your new rock garden to the local aesthetic or perhaps you want to create something exotic and stand out? You may even wish to recycle stone from another property or project and add a hint of sentimentality to your vision.
In terms of sourcing suitable rocks if you don’t already have what you are after it may be worth checking with local building merchants or even local landowners who may happily part with a few rocks that would do just the trick. Always get permission though.
Thinking about the rocks and how you would like them to be displayed is also important. It often works best to mix rocks of varying sizes and shapes to allow the creation of focal points and to help accommodate plants of differing sizes.
When you get around to placing the rocks make sure they are at least halfway buried to ensure they remain stable through the season. It is also worth tilting the rocks slightly to allow water to run off. As the rocks settle and age they have the potential to naturally attract moss and lichen to add a new source of colour and life.
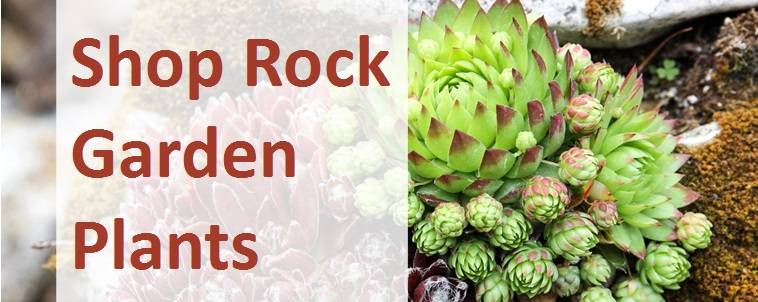
Alpine plants to consider
Now that the drainage and rocks are in place it’s time to start choosing your plants and getting them planted. Alpine plants are great candidates for rock gardens as they like well-drained soil and are perfectly suited to long periods of sun exposure as well as sitting lower to the ground to help avoid wind and bad weather. The following alpines from our selection of plants are a great starting point.
- Arabis caucasica 'Snowcap' - Thriving in sun and shade alike the Arabis can provide green ground-covering leaves and taller flowers all through the spring. Aribis Caucasica is a highlight offering gorgeous white flowers that give off a sweet scene.
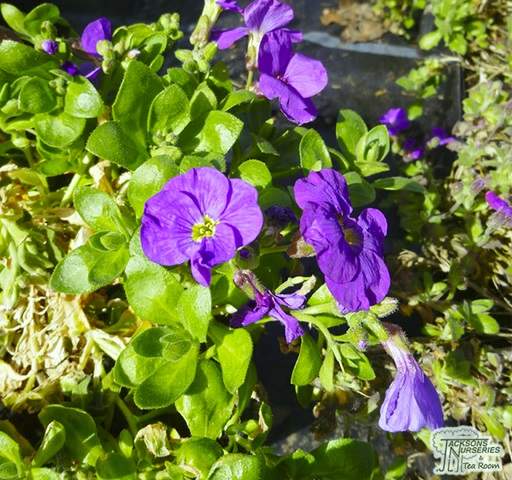
- Aubrieta 'Royal Blue' - Aubrieta are available in lots of great colours and are a fantastic plant for a rockery as they are an evergreen perennial with small leaves that minimise water loss from the leaf surface, making it drought tolerant. It produces an abundance of single, four-petalled flowers. It also looks stunning when allowed to trail and cascade over low walls or other obstacles.
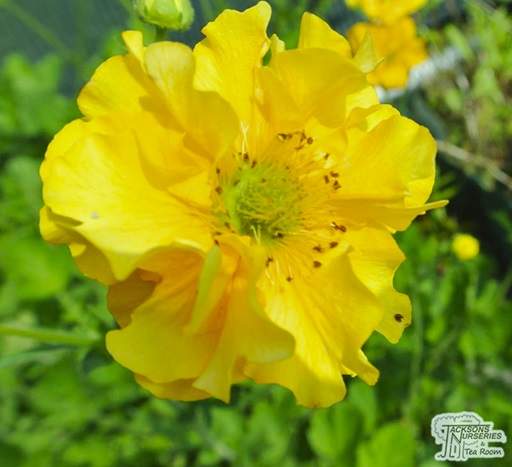
- Geum 'Lady Stratheden' - Geum ‘Lady Stratheden’ is a great perennial that offers up a huge burst of colour during the summer months and can be dotted about or planted in larger groups and is bound to make your rock garden burst with life and colour. This alpine will survive happily in anything other than permanently damp soil.
- Helianthemum 'Ben Hope' - Another excellent and attractive low maintenance plant is the Helianthemum ‘Ben Hope’. This long flowering rock rose produces large amounts of beautiful crimson pink leaves with a golden orange centre. Their exotic appearance is ideal for a south facing rock garden.
Finishing touches
It’s definitely worth looking around for lots of lovely plant types to use with your new rock garden and it is important to consider how to protect all of your hard work from pests. Sharp-edged gravel around the border of your rockery or around individual plants will help deter slugs and snails and other coloured gravel can be used to highlight specific features.

Rustic looking pots can also be used as a source of protection for those especially delicate plants or to add an established aged effect. Another great use of pots could be to display cacti if you’re aiming for an especially arid look.
Hopefully using the information above you will be well on the way to designing and implementing your own rock garden. The results of which can be enjoyed relatively maintenance free for years to come.
Share this page: