Check Here Before Buying – Pot Size Matters...Not all websites offer the same. Plants in a 2-litre pot have twice the root system of a P9 or 1 litre pot.
How to plant, grow and care for Conifers
This article explains how to plant, grow and care for conifers in the ground.
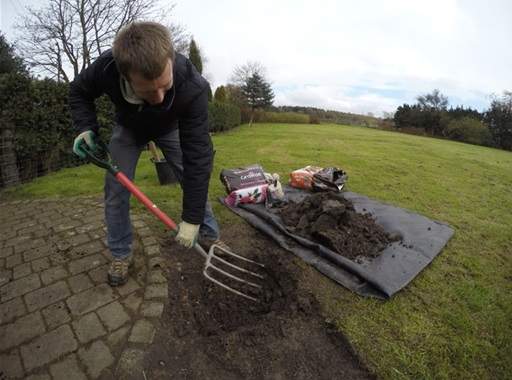
1) Dig the planting hole
- Dig your planting hole wider than your conifers container. This helps ensure the surrounding soil is broken up, allowing your conifers roots to spread outwards.
- If you're planting a single specimen, dig the planting hole twice the diameter of its container and to the same depth.
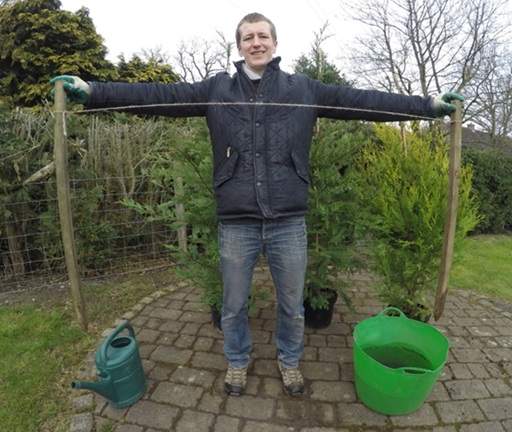
- If you're planting a row of conifers as a hedge, you may find it helpful to insert two sticks at each end and tie a guide line between them using string to help you form a straight line.
- For hedging, dig the trench at least 20cm wider than the root ball.
2) Preparing the planting hole
- Use a fork to break up any compaction of the soil at the bottom and around your planting hole.
- This is important particularly in heavy soils where the clay is prone is smearing- you'll want to break up the shiny layer so the roots can penetrate the ground around it with ease.
- If you're planting in a light soil, lightly firm the ground at the base of your planting hole to avoid your plant sinking deeper in the planting hole than you wanted it to later on.
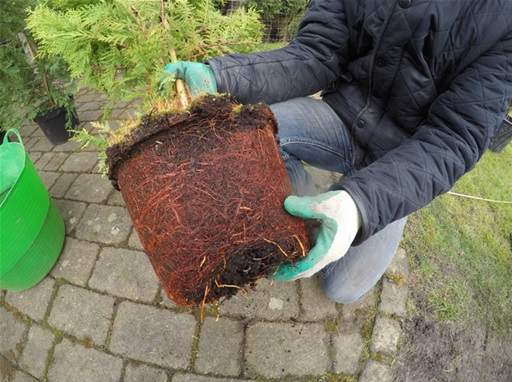
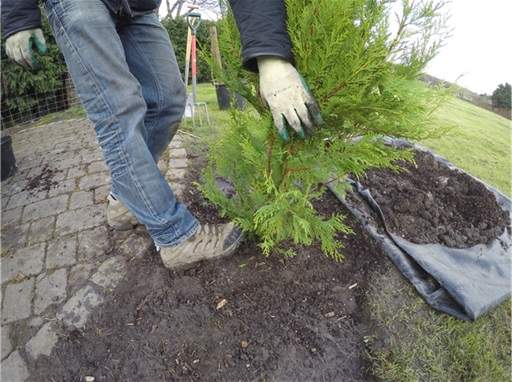
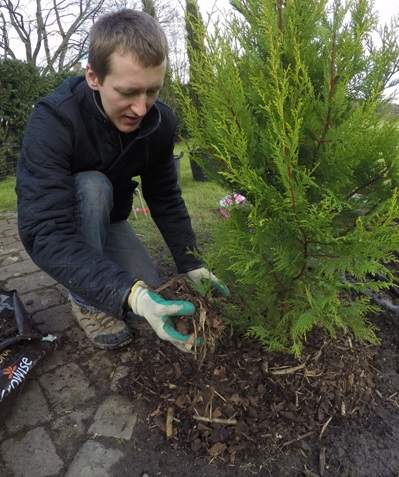
3) Tease out the roots from the root ball
- If you're planting a containerised conifer, trim any roots that may be growing out of the drainage holes and tease out any roots circling around the container.
- This will encourage the roots to move out from the circular shape they adopted in the pot once planting out.
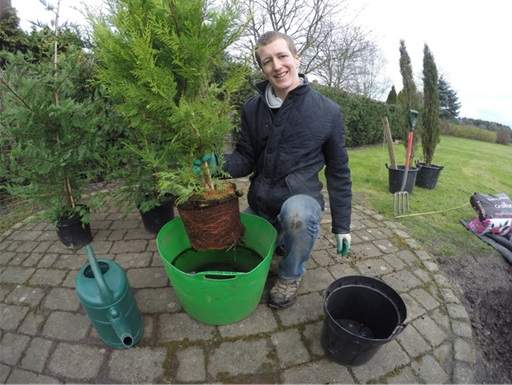
4) Soak the rootball in a bucket of water
- Dunk the rootball in a bucket of water for 20 minutes before planting, allowing the water to seep into the centre.
5) Sprinkle some mycorrhizal fungi around the roots
- Mycorrhizal fungi forms beneficial associations between the roots and the soil, which will help your conifer take up a larger range of nutrients and water.
- It is applied by simply sprinkling the powder around the sides of the root system.

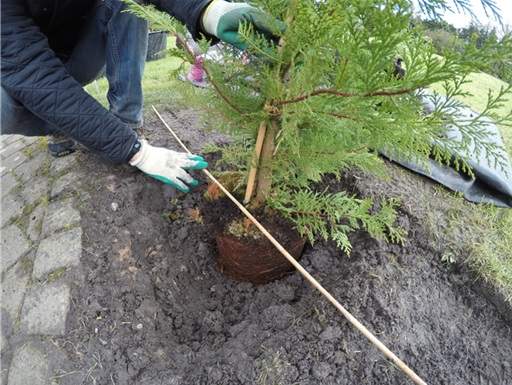
6) Check the depth of your conifer in the planting hole
- The top of the roots should be at ground level when the rootball is placed in the planting hole.
- You can check the right depth by looking for a change in colour of the stem of your conifer too. If the discoloured portion of the stem protrudes entirely underground, you have the right depth. When the discolouration stops, the stem should be at ground level.
- We recommend using a bamboo cane or plank of wood to check planting depth. Avoid planting your conifer too deep as this can cause the base to rot and roots to grow more slowly.
- Before backfilling, have someone view the conifer from several directions to check it's straight.
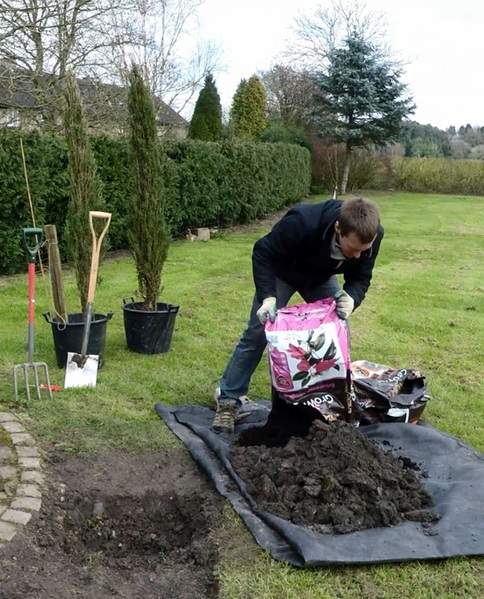
7) Backfilling
- Root balled conifers may be wrapped in treated or plastic "burlap" that's often green. Whilst it's fine to keep these coverings on until this point, they do not decompose and should be removed before you start backfilling your hole with soil. Untreated burlap can be buried if you wish.
- Refill the hole with the dug soil, ensuring there are no air pockets around the roots.
- You may wish to mix the dug soil with up to one-third ericaceous compost to add nutrients and improve the soil structure if planting in heavier ground. If you have a heavier clay soil, incorporate some horticultural grit into the planting mix to improve drainage.
- Having someone help you with the planting is very helpful when backfilling because one can backfill whilst the other holds the conifer in position, preventing it from sinking or falling over.
- Shake the conifer a little as you backfill to help the soil settle around the roots.
- As you continue the backfill you can start firming the conifer into the hole. Again, it helps for one person to hold in an upright position whilst the other firms down the backfilled soil.
8) Firming down
- Firm down the soil with your toe pointing towards the conifer so you're not pushing the conifer down, just firming the soil around it. Then cover the ground where you've firmed the conifer in.
- Creating a rim of earth around your conifer allows water to be concentrated over the roots, rather than running off into the surrounding soil.

9) Staking your conifer tree (if required)
- Newly planted stand-alone conifers, such as pine trees, should be secured with a tree stake to prevent them from rocking in the wind. Wind rock can tear the roots and create a gap around the base of the trunk that can fill with water and encourage rot.
- Install a stake at a 45 degree angle to avoid damaging the rootball. That will be enough to anchor the base of your plant and hold it in place in the ground.
Aftercare
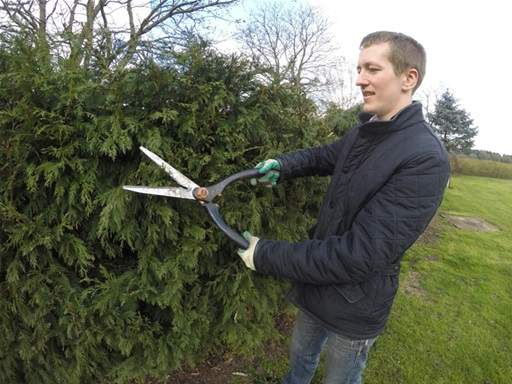
Pruning
- Give your conifers a light trim in April, June or August. Any dead or diseased conifer branches should be removed immediately, regardless of the time of year.
- Do not cut into old wood as it will not regenerate. The only exceptions to this are yew and, less reliably, Thuja, which can be pruned hard and will still re-grow. For all other varieties, a good rule of thumb is never to remove more than one-third of the total growth at a time.
- When pruning the sides of a hedge, taper them in at the top to ensure the base receives enough sunlight. This is the best way to avoid those dreaded brown patches that look unsightly.
- If you want to maintain a Leylandii hedge at 180cm (6 feet) tall, first let it grow to 210cm (7 feet) then trim it back to 180cm.
Feeding and mulching
- In spring, feed with an ericaceous fertiliser, water in then apply a 2-3 inch (6-7cm) mulch of ericaceous compost, leaving a gap between the mulch and trunk to prevent rotting and disease.
- For the first couple of winters, it can be helpful to surround the base of the trunk with a straw mat to protect it from cold, harsh winds.
Mulching your conifer helps suppress weeds, retain moisture and keep the roots cool
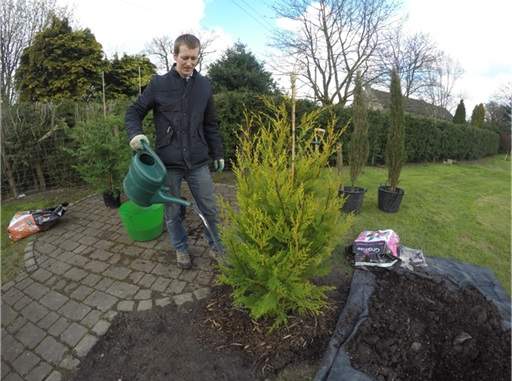
Watering
- Keep your conifer well watered for the first two growing season as it establishes its root system in its new location.
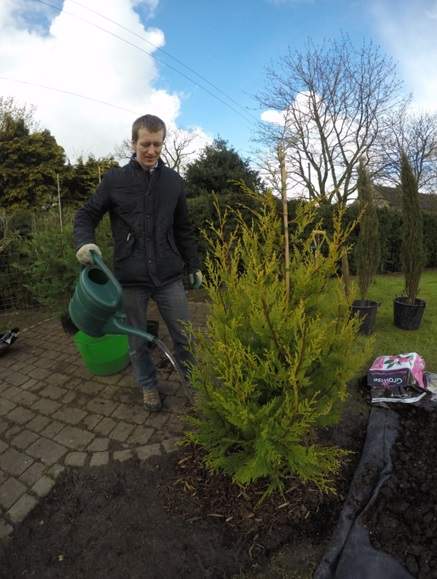
Water well for the first 2 growing seasons
Avoiding Brown Patches
- The most common cause of brown patches is adverse growing conditions - waterlogged soil, prolonged frosts or chilling north of easterly winds.
- Aphids or fungal disease is another common problem. The first sign of aphid problems is often the presence of sooty mould. If spotted, remove the mould with soapy water or spray with a fungicide. Only then spray with an insecticide if you can see that insects are still on the plant - they will often have moved on by the time their presence is spotted.
- Browns patches often don't regenerate again and take several years when they do, so if the problem areas are large your best option may be to replace it with a new conifer.

Share this page: