Check Here Before Buying – Pot Size Matters...Not all websites offer the same. Plants in a 2-litre pot have twice the root system of a P9 or 1 litre pot.
May Gardening Jobs
Across the Garden
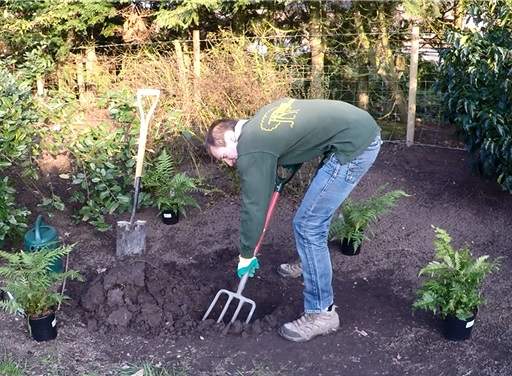
Add Interest to Shady Borders with Hostas and Ferns
- May is the perfect time to add colour and interest to your shady borders by planting hostas or ferns. Hosta plants have heart-shaped, often variegated foliage, while ferns offer beautiful, intricate, unfurling leaves. Both provide a graceful backdrop to showier flowering plants.
- We recommend planting ferns and hostas at the same distance as their eventual spread.
- Dig your planting hole to the same depth and 1.5 times wider than the rootball of your plants. Use a fork to break up any compaction of the soil at the bottom and around your planting hole.
- Tease out the roots from the rootball, check the planting depth with a cane and backfill with your dug soil, mixing in plenty of organic matter such as garden compost or leaf mould.
- Firm down using the heel of your boot and water well once planting is complete. Apply water directly to the roots, not onto the foliage of your plants, to prevent the foliage from rotting.
- Mulch with 5cm (2 inches) of bark or garden compost after planting and again each spring to boost nutrients and retain moisture and feed sparingly using blood, fish and bone.
Frost Protection
- Temperatures are starting to rise but there can still be frosts in some areas.
- Keep an eye on your local weather forecasts and remember to protect any plants which need help such as hanging baskets and early blossoms on fruit trees and fruit bushes.
- A good technique is to wrap the pot in bubble wrap and wrap plenty of layers of horticultural fleece around the top parts of your plants, being careful not to damage fragile varieties. Loosely secure using string or garden twine, being careful not to squash or suffocate your plants.

Support and Tie-In Climbers
- With fresh growth soon appearing on any climbers in your garden, now is the time to provide them with support such as trellis or wire and tying stems into the support using soft string.
- This is particularly important for twining climbers such as honeysuckle, clematis and wisteria which grow by wrapping themselves around the support structure.
- Arches, pergolas and arches are some of the most elegant ways to support climbing plants, whilst other supports are designed to be less noticeable and ‘fade into the background’. If you’re on a budget, consider using materials sourced from the garden, such as sturdy branches or bamboo canes made into a wigwam structure and tied together at the top with twine.
- Tying in climbing and rambling roses such that their stems are nearly horizontal will encourage the rose to throw out side shoots which will produce more blooms.

Harden Off Tender Plants
- Hardening off is the process of gradually acclimatising frost tender plants to the outdoors after originally being raised indoors over a period of 1-2 weeks in May.
- Plants can be weakened by being permanently moved from a stable indoor environment to the outdoors with its greater variations in light, temperature and wind conditions too quickly.
- Start hardening off a week before the final frost date when you live. Start by moving plants outdoors for just a couple of hours a day, then gradually increase this by 1-2 hours per day.
- Water plants before moving them outdoors each day - wind speeds up the evaporation rate.
- Start hardening off on overcast days when the temperature is quite constant. Avoid very hot and sunny days as sudden bright sunlight can cause the leaves of delicate plants to scald.
- Cluster your pots together to stop them blowing over and so the plants on the outside provide a windbreak for those in the middle. Place plants into buckets, tubs or crates if you have them.
- Some excellent options for hardening off are using an unheated greenhouse or cold frame. Follow the same steps as if you were moving them outdoors, increasing from 2 hours per day.
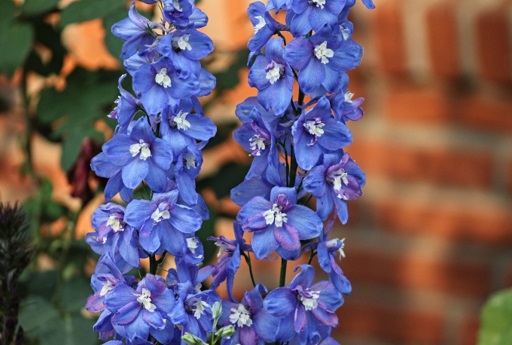
Provide Support for Tall, Top-Heavy Perennials
- Staking tall-growing perennials early in the season helps prevent their stems snapping or flopping around in the wind, which can damage your precious plants and flowers.
- Perennials that benefit from staking, especially in exposed windy sites, include delphiniums, lupines, agapanthus, aquilegia, penstemon, dahlia and peony. Avoid growing tall perennials in excessively nutrient rich soil, as this can exacerbate the growth by encouraging soft new growth.
- May is the ideal time to install plant supports, before they’ve had too much chance to grow. Continue tying in the stems or raising the level of the support as required over the year.
- Bushy, clump forming perennials such as phlox and campanula grow well through grid supports or netting. Single stem ring supports are effective with foxgloves, poppies and compact delphiniums, whilst rudbeckia and delphiniums are best supported with canes and twine.
In the Flower Garden
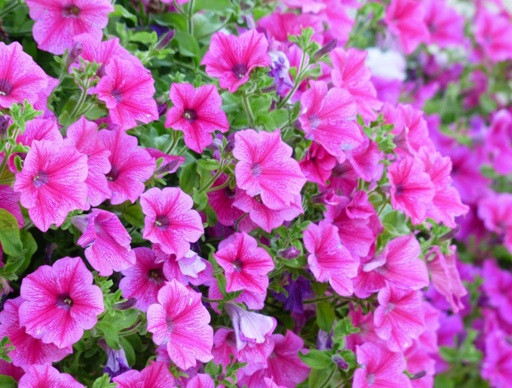
Plant out Summer Bedding and Tender Annuals after Risk of Frost
- In most parts of the UK, the risk of frost will pass some time in May, which is the right time to plant out summer bedding and tender annuals such as nasturtiums, cosmos and sunflowers.
- Bedding is best planted in groups of the same variety in odd numbers to create a naturalistic appearance. Plant taller varieties such as cosmos at the back of beds and borders with shorter growing varieties such as pansies, marigolds and petunias at the front.
- For a more formal appearance, plant in linear grouping in blocks of bold colours. For a cottage garden style garden, incorporate summer bedding in drifts between perennials and shrubs.
- Start by preparing the ground: removing weeds using a fork, digging the ground and breaking up any large blocks of soil, then raking to a rough tilth so roots have a good structure to grow into.
- Mix in a plenty of soil improver, manure or multi-purpose compost to enrich your soil. Fork the material in deeply so roots of your plants grown down to the moisture and nutrients.
- Use a trowel to dig a hole the same depth but a little wider than the pot or container your summer bedding is being removed from. Check the top of the rootball is level with the soil surface before backfilling, adding or removing soil from the bottom of the hole if required.
- Water regularly to stop your plants drying out, especially on hot, dry and windy days.
Prune Spring Shrubs after Flowering to keep them Compact
- As temperatures start to warm up and days start to get longer, plant surge into growth, making May a busy time in the garden for pruning spring shrubs after flowering to keep them compact.
- Shrubs best pruned in May include forsythia, chaenomeles, buddleia and lavender, as well as ornamental grasses. Spring pruning improves air circulation and provides space for new growth.
- Shrubs like buddleia and fuchsia flower on the same year’s growth, so can be cut back almost to ground level. Varieties like forsythia flower on older growth, so cut them back more sparingly.
- Start by removing any dead, diseased, damaged and crossing stems, as well as any unhealthy spindly growth. Then aim to create an open, goblet-shape with plenty of place for air circulation around your plants – this helps reduce the risk of pests and diseases.
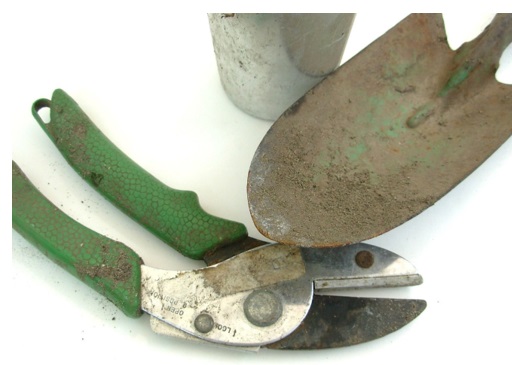
- Key equipment for pruning includes gardening gloves (especially for plants with thorns), secateurs, a folding pruning saw and loppers with a long handle to give you more leverage.
- After pruning, mulch with a 5-8cm (2-3 inch) layer of well rotted garden compost, manure or bark chippings. Mulching has the dual benefit of helping retain moisture and suppressing weeds.
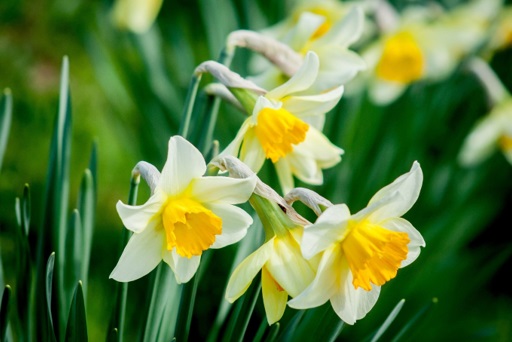
Apply Liquid Feed to Spring Bulbs to get a Good Display Next Year
- Bulbs are plants that store their energy and nutrients below ground at the end of the growing season. They’re like a little battery with the flower and the leaves right in the middle, ready to burst into life at the start of their growing season.
- Once flowering has finished, bulbs dies back underground, taking as much energy as they can to charge up for future years. So by planting just a single bulb, they will keep growing and reproducing fabulous flowers year after year - an excellent investment for your garden!
- Avoid the temptation to remove any faded, yellow or wilting leaves when your bulbs die back at the end of their display, as they’re busy sending nutrients back into the bulb for next year.
- After spring bulbs have finished flowering, if they’ll be kept in the ground over the next year until they flower again next spring, it’s worth supplying them with additional liquid feed to help them replenish their energy reserves and provide for a bumper display of flowers next year.
- A balanced all purpose liquid plant feed works best.
Reinvigorate Big Clumps of Perennials by Lifting and Dividing
- Perennials growing healthily will need to be lifted and divided every 3-4 years. Dividing helps prevent plants becoming too large for their location, maintains vigour and allows you to remove the oldest central parts of the root system which may have died out.
- Plants should be lifted and divided in early spring when the new growth is only a few inches high. If you miss your chance, wait until late autumn - don't be tempted to do it whilst your plants are in flower or full growth. The only exception is Iris plants which should be transplanted in early summer, immediately after they have flowered.
- Dig up the entire plant with some surrounding soil and lay it onto some tarpaulin or weed control fabric. Use a sharp spade to carefully chop clumps into smaller pieces, ensuring that each piece is not too small and has sufficient roots to successfully re-establish - splitting large clumps into 3-4 pieces is normally recommended.
- Once split, replant each divided clump with sufficient space in the garden or a container.

Plant up Hanging Baskets with Summer Bedding to keep Indoors until after Risk of Frost
- It’s not too late to start planting up your own hanging baskets and containers in May using summer bedding such as geraniums, fuchsias, petunias, lobelia and verbena plants.
- Different types and styles of baskets are available from garden centres, typically made from metal, plastic or wicker. They may have a thin plastic lining or coyer matt to retain water.
- Many people choose one of the cheaper baskets because the truth is, once the basket has been filled, you don’t see much of it anyway, especially if growing trailing plants out the sides.
- Use a liner around your basket and place a saucer at the bottom before planting up to prevent water from flooding out of the bottom when you water.
- Plant up using a mix of compost and water retaining gel. Water retaining gel is ideal to help stop hanging baskets (especially smaller ones) drying out very quickly by storing water and releasing it gradually over time. Use one scoop of gel for every 2 handfuls of compost, mixing it in well.

Garden Maintenance
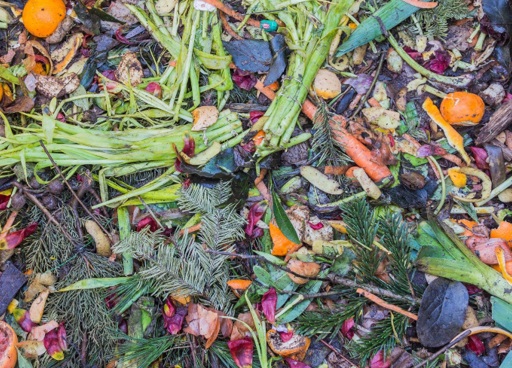
Start a Compost Heap to produce your own Garden Compost
- Home produced garden compost is an invaluable resource, providing high quality growing and mulching materials at no cost. The key nutrients plants required are: (1) nitrogen – for leaf growth; (2) phosphorus – used to form roots, make seeds, fruits and flowers; and (3) potassium – aids the production of strong stems and fast growth.
- Choose the location for your compost heap carefully – it should be on a site that’s level in a well drained spot to allow excess water to drain away. This also makes it easier for worms to get in amongst your compost and help with the decomposition process.
- Good materials to put on your compost heap include vegetable peelings, plant prunings, grass cuttings, fruit waste and teabags. These are high in nitrogen and break down quickly. Other useful materials include fallen leaves, cardboard egg boxes and scrunched up newspaper. These are slower to decompose but provide vital fibre & carbon, as well as helping create air pockets.
- Avoid putting any meat or dairy products on your compost. Also avoid adding perennial weeds like thistles or dandelions and any weeds with seed heads that could sprout up in your compost. It goes without saying, avoid adding any diseased plants, dog poo or cat litter and non-composable materials like metal, glass or plastic.
- You’ll need to turn your compost heap regularly to allow air in and help it decompose. The best way to do this is using a pitch fork, using it to move the material in the middle to the outside and the material on the outside into the middle, turning the material as you go.
Trim Topiary to Keep it looking Sharp
- Topiary refers to shrubs trained or clipped into clearly defined, geometric or fanciful shapes such as balls, cubes, obelisks, pyramid cones, or tapering spirals. It has increasingly come back into fashion in recent years, generally using dense, small-leaved evergreens.
- Clipping tools range from hand tools such as specialised topiary shears, to large electric shears depending on the size of your project. When shaping your plant make sure you are wearing gloves to protect your hand and consider eye and ear protection if using motorised clippers.
- Late may into early June is a good time to prune evergreen topiary. Plants such as box will have burst into growth in March and by now may be looking a bit uneven & ‘rough around the edges’.
- Topiary balls and cones can be trimmed by eye but for greater accuracy especially for straight edges, we recommend creating a guide for yourself using twine connected between two canes.

Weed and use Groundcover plants
- Weeding is one of the most essential tasks to do in your garden in May. Getting on top of perennial weeds now to save you a lot of time in future months.
- Hoe off surface weeds and hand-weed borders regularly so weeds don't have time to set seed. This is best done on a dry day with light wind, so the weeds will wilt on the surface of the soil, rather than re-rooting into moist soil and causing you a problem again further down the line.
- Pull out any larger weeds by hand, being careful to remove their longer tap roots.
- A weed knife is an effective tool for weeding between paving slabs. Alternatively, you can scorch off weeds between paving slabs using boiled water from a kettle or a flame gun.
- Once under control, apply a layer of mulch that will help to keep weeds at bay and consider growing groundcover plants such as Ajuga reptans, Hostas, Geraniums and Stachys byzantine.

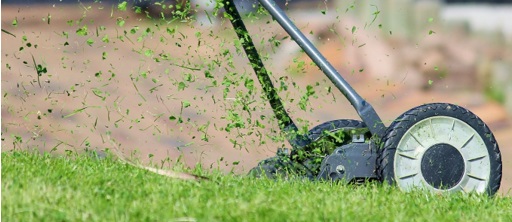
Lawn Care
- Your lawn should be starting to flourish by now, so it’s time to get the mower out.
- Depending on your lawn, you may need to start mowing on a weekly basis.
- Ideally you should roll your lawn before cutting to iron out any winter frost heave and check it for stone and dog bones etc that could damage the mower blades and become a missile.
- The first cut should always be a light top trim. Then trim the edges with a half moon edging tool to keep a neat appearance. Lawn weed and feed can be applied to bring the lawn to condition.
Fruit & Vegetable Garden
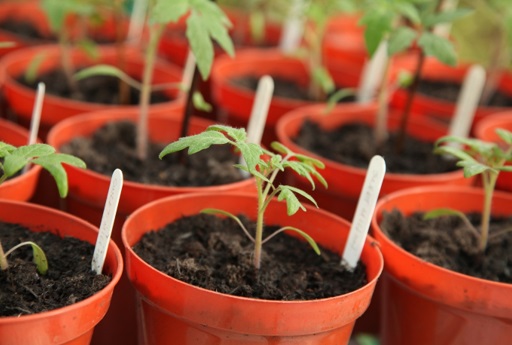
Harden off Tomatoes
- Harden off tomatoes outdoors to prepare them for being planted out when frost risk has passed.
- There are 2 main types of tomatoes: determinate (bush) and indeterminate (cordon) varieties. Cordon tomatoes are trained to grow taller and therefore need the support of a cane or stake. Bush varieties, as the name suggests, bush out wider rather than taller, so do not need support.
- Hardening off tomatoes involves gradually acclimatising them to the outdoors over the course of 1-2 weeks, after they’ve initially been raised in the greenhouse or on a windowsill.
- This has to be done gradually, starting with 2 hours outdoors per day and increasing the time by an hour per day over the course of a week or so. Too much too soon will weaken your plants.
- Keep your tomato pots together when hardening off. They’re less likely to blow over in the wind this way and the ones of the outside will help protect plants on the inside from the wind.
- Some excellent options for hardening off are using an unheated greenhouse or cold frame. Follow the same steps as if you were moving them outdoors, increasing from 2 hours per day. Alternatively, place plants into crates, tubs or buckets if you have them.
Start Sowing Salad Leaves
- Salad season is upon us! Now is the right time to start sowing these “cut and come again” crops.
- Salad leaves are quick and easy to grow. Within a few weeks you’ll have a plentiful supply of delicious, healthy greens tasting better than anything you can find on the supermarket shelves.
- The most popular to sow is lettuce seeds, but there are many others to choose from including cress, rocket and spinach. You can also start to sow beetroot, watercress and celery in May and, if space is limited, chillies and sweet peppers make great choices for growing in containers too.
- Sow salad leaves every few weeks for a continuous supply of fresh leaves throughout the summer. Grow them in full sun in a well-drained soil. They work well in containers or grow bags too, or even in a gap in the border close to the front door for easy regular pickings.
- If planting in the border or vegetable plot, prepare the ground by removing weeds, digging the soil to break up large clumps, then raking to a fine tilth. Sow thinly at a depth of 1cm (1/2 inch).
- Thin out seedlings as they grow to avoid over-crowding & give them space to fully develop and water them regularly to stop them drying out.

Sow Sweetcorn in Deep Pots
- Sweetcorn is a classic, easy-to-grow allotment crop with a tall, stately structure that’s well suited for delineating different parts of your vegetable patch.
- Home-grown sweetcorn is delicious, sweet and juicy either eaten raw or placed straight into the pan or under the grill within a few minutes of picking.
- May is the perfect time to sow sweet corn. Its best started off in 9cm pots or tall seed tray modules, then planted out into rich soil in a sunny spot when risk of frost has passed.
- It’s best to give each seed its own pot because sweetcorn seedlings don’t respond well to root disturbance. Water well & place in a greenhouse or on a sunny windowsill whilst they germinate.
- Once risk of frost has passed, harden off your sweetcorn plants by putting them outdoors during the day for 1-2 weeks, starting with 2 hours per day and increasing by 1 hour each day.
- When you’re ready to plant outdoors, plant them in groups or grid formations, rather than long rows. This will work best irrespective of the wind direction, given sweetcorn is wind pollinated. Sweetcorn prefers a rich soil with lots of sun and good drainage.

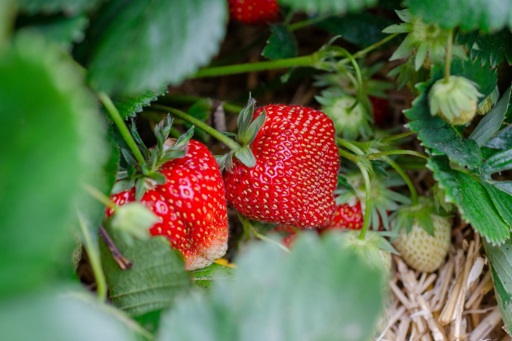
Remove Unwanted Runners from Strawberry Plants
- Runners are strawberry plants way of propagating themselves. They are long stems that emanate from your existing plants, spread their way across the surface of the soil before setting roots to create new baby strawberry plants.
- Strawberry plants tend to have a productive life of around 3 years. They’ll produce the best crops if runners are removed so all of the plant’s energy is invested into production of the fruits.
- To remove runners, grab each runner, follow it back to the plant and either cut the runner away using scissors or secateurs or hold it between your thumb and forefinger and snap it off.
- Alternatively, if you want to actively propagate new strawberry plants, choose a healthy runner than has set root and produced leaves and pin it into the ground (or another pot if you’re growing strawberries in containers) using a “U” shaped staple or piece of wire. Keep the stem linking the baby plant to its parent for now – only cut this away when the new plant has developed strong roots.
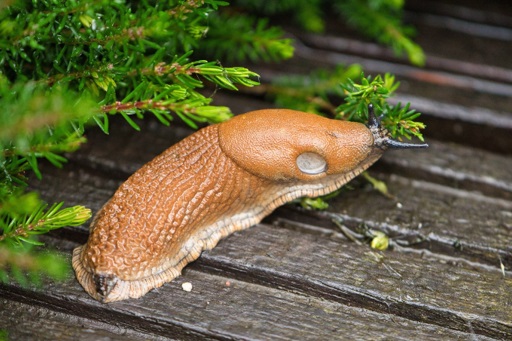
Reduce Slug and Snail Populations on Damp Evenings
- Slugs & snails are most active on damp evenings when they have to secrete less slime to travel. So if you want to reduce your slug & snail population so they do less damage to your plants, damp evenings is the perfect time to hunt them down.
- We also recommend creating habitats for predators of slugs to thrive, so they can help do some of the slug hunting for you. Birds such as blackbirds and thrushes will eat slugs, so if you provide them with berried shrubs and places to nest in hedging and mature shrubs, they will help you.
- Protect vulnerable plants such as vegetables by leaving a ring of broken egg shells around your plants or using copper rings. Bury copper rings deeply so slugs cannot get underneath them.
- If you’re growing vegetables in containers, space them apart so there’s not a “bridge” of leaves from one plant to another – slugs and snails often move between potted plants in this way.
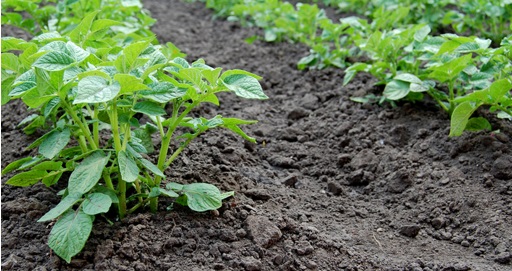
Earth Up Potatoes
- Once your potatoes reach 15-20cm (6-8 inches) above ground, they should be ‘earthed up’. Earthing up is essential because tubers become poisonous and useless once they turn green.
- ‘Earthing up’ means covering most of your potato plants with earth by drawing in soil around the stems of your plants using a hoe. Leave 5cm (2 inches) of growth visible about the ground.
- Begin earthing up once the shoots of your potatoes have reached around 20m (8 inches).
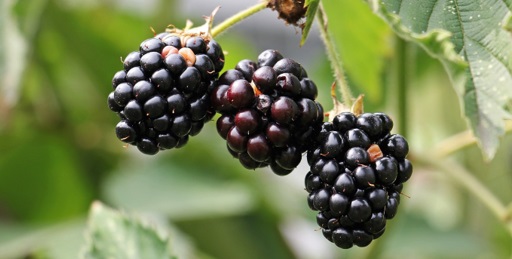
Tie-In New Blackberry Shoots
- Blackberry plants are easy-to-grow, pest and disease resistant and suitable for smaller gardens. They can be trained over a pergola or arch, grown as a fan against a wall or kept in a container on the patio. They’re often used for their attractive flowers as well as the fruit.
- New shoots on fruit bushes such as blackberry plants need to be tied in & caned for support.
- Cover any soft-fruits in netting to prevent any wildlife pilfering your crops. May is a good time to apply a general purpose fertiliser and mulch around the base of your plants to boost nutrient levels and aid water retention.
- Blackberries current season's stems are called primocanes which sprout from the rootstock from midsummer and will not bear fruit or flowers until the following year; whilst last season's stems are called floricanes and will bear fruit and flowers in the current year.
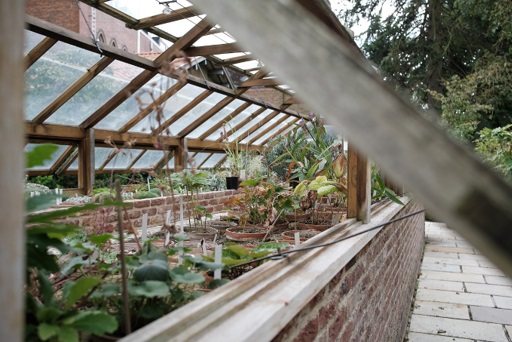
In the Greenhouse
Keep your Greenhouse Plants Well Watered
- Keeping your greenhouse plants well watered is especially important for plants growing in smaller pots that will dry out more quickly, as well as thirsty crops such as cucumber, courgettes and tomatoes. On hot dry days, containers can become dry within a few hours of watering them.
- Young plants, cuttings and seedlings will normally need to be watered every day or two. Plants in this category include trees ferns (water their trunk), cucumber, garden peas and tomatoes. Direct water to the compost above the roots, not onto the foliage, flowers or fruits.
- Plants with shallow root systems will normally need watering once a week at this time of year, under typical weather conditions. These include ferns, bedding plants, perennials that prefer a moist soil, vegetables like celery, lettuce and spinach, bog plants and subtropical plants.
- If you need to prioritise, the types of plants you’ll get away with watering once a fortnight include fruit trees, camellias, clematis and roses. Clematis in particular prefer their stems to be in the sun but roots to be in the shade – mulching generously is the best way to achieve this.
- A good rule of thumb is to check if the ground is bone dry 5cm (2 inches) below the surface. If that’s the case, your plants are ready to be watered again.
Tie in the Stems of Cucumbers, Aubergines and Tomatoes
- One essential task for indeterminate (cordon) varieties of tomato at this time of year is staking. Cordon tomatoes are the type that produce fruit continuously until a hard frost ends the season.
- Cordon tomato varieties are trained to grow tall and need the support of a cane or stake. Staking helps keep fruit off the ground, stops stems from snapping under the weight of your tomatoes, improves air circulation to reduce issues with pests and diseases and makes harvesting easier.
- One option is to use a single stake such as a bamboo cane inserted securely into the ground by the roots of your tomato plants, then using soft string to gently tie your tomato stems into the stake. Avoid using thin string as this may dig into and damage the stems of your plants.
- Another option is square mesh netting supported at either end with strong or poles. Keep the netting taunt for best results. This tends to work well for tomatoes planted together in rows.
- Tie in your tomatoes by double knotting thick string around the stake or netting, secure it around a stem just being a branch (this is where your tomato plants are strongest), loop the string back to the stake or netting and tie it off. Avoid tying a know around your plants.
- Repeat this method every 25cm (10 inches) all the way up your plant. Check ties at the lower parts of your plants have not become too tight as your plants continue to grow.
Check your Plants Regularly for Pests
- Whilst greenhouses are effective for protecting your precise plants, they also provide a haven from the elements for pests and diseases that can quickly ruin all of your hard work.
- Regularly inspect your plants, especially those in the greenhouse, for pests and diseases such as aphids, leaf larvae, fungus, white fly and mealybugs.
- As with any form of disease, cleanliness is top priority. Keeping your greenhouse clean and disinfecting your tools goes a long way to reducing pests and diseases. Disinfect tools like secateurs and trowels using warm soapy water & scrub them with a drop of Fairy liquid.
- Don’t be tempted to skimp on good quality potting compost. Avoid using soil from your garden borders in the greenhouse. It will be packed full of creepy crawlies, insect eggs and other pests.
- Use insect catchers to catch pests. Simple ones like hanging fly papers and spider spray can be very effective. If you think your greenhouse is infested, an extreme measure you can adopt later in the year is to open all the doors and windows during the winter to freeze the pests out.
- In the meantime, use pest control products such as bug stop spray, fungus stop spray and rose guard to keep pests in check. Alternatively, research biological controls for your pests – for many of them there will be other organisms that can help you control the issue in a natural way.

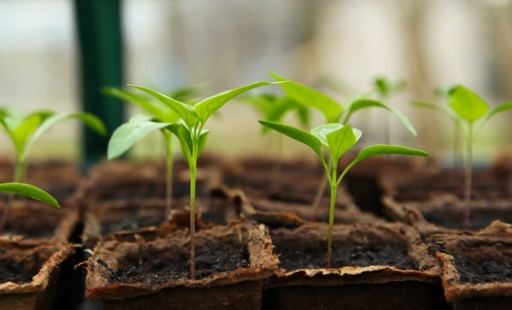
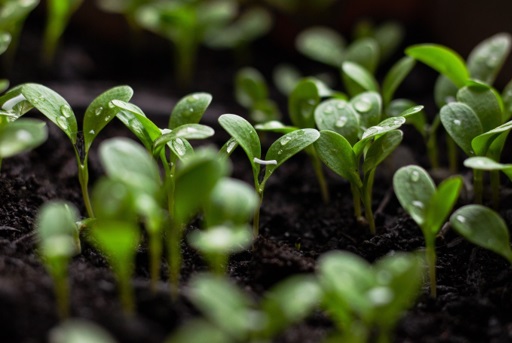
Prick out Seedlings when they get their First True Leaves
- Carefully lifting seedlings out of a seed tray is called pricking out, allowing them to be planted on to larger pots to grow into bigger and stronger plants.
- Depending on the size of your seedlings, you’re going to need a dibber or simply a pencil or lolly stick. Whatever you use, the idea is to use it to loosen the soil around your seedlings and then support the rootball of your plants whilst you carefully lift them into the larger pots.
- Fill your larger pots with compost, knock the base or use a tamp down to eliminate air pockets.
- When you’re ready to transplant, always handle seedlings by the leaves, never by the stems. Stems are fragile and snap very easily. Dig your dibber in, work it around the roots to free them, then lift your seedling, holding them by the leaves & supporting the root ball using your dibber.
- Use the dibber to create space for the rootball in its new pot, then gently backfill the soil around.
- Water your seedling into its new home using a watering can with a fine rose, directed at the compost not the seedling itself.
- Thinning out seedlings in this way helps prevent over-crowding and keeps fungal diseases at bay.
Continue to Ventilate your Greenhous & Catch Pests
- Greenhouses are prone to overheating in sunny weather. Continue to use a minimum/maximum thermometer to monitor the temperature of your greenhouse through May. Plants will start to get damaged if temperature are allowed to build up beyond 27 degree Celsius.
- On sunny days, protect your plants by taking excess heat out of your greenhouse by openings vents, windows and/or doors and using shading when required.
- Consider installing automatic vent openers which open/close based on temperature. Remember many of these work based on a wax that expands when the temperature rises, so they may be a little slow to react when temperatures rise quickly; some manual monitoring is still advisable.
- Hang traps for any flying pests in your greenhouse, such as whitefly.
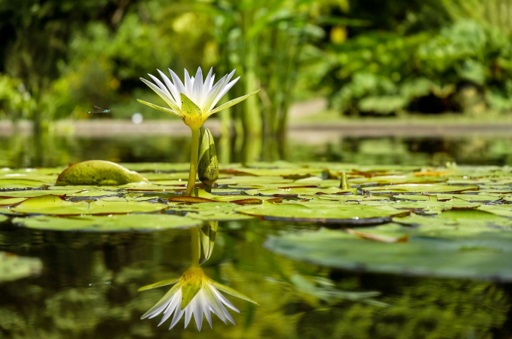
Pond Care
Remove Algae and Pond Weed from Ponds & Water Features
- Maintaining a healthy pond makes it more visually appealing and helps the plants, fish and wildlife in your pond. Algae often develops in ponds but can removed without harming your fish.
- Signs of blue-green algae problems include foul smelling water, sickness or death of pets, dead fish or waterfowl and skin rashes on humans after contact.
- If your pond is small enough, remove algae manually using a pond or garden rake to get as much of it off the surface of your pond as possible. If your pond is larger, we recommend using a chemical algaecide, for which it’s best to get professional help to ensure the right application.
- The best way to avoid algae issues is really to prevent algae from growing in the first place. You can do this by putting 1 bale of barley straw into your pond and securing it near the surface. It will release natural chemicals into the water as it decomposes, which prevent algae growth.
- Other preventative solutions include growing plants around your pond and installing a pond aeration system. It takes some effort but it’s worth it in the long run for the health of your pond.
Share this page: